
A small kitchen can feel busy fast. One cutting board takes over the counter, pans crowd the stove, and there never seems to be a proper place to prep, serve, or sit for a quick coffee. That is where the right DIY kitchen island ideas for small kitchens can make daily cooking feel easier without needing a full remodel.
The good news is that a kitchen island does not have to be huge, built-in, or expensive. A narrow cart, small table, repurposed dresser, butcher-block cabinet, or rolling shelf can add storage and workspace while still keeping the room open. The key is scale. A small kitchen island should help your routine, not block it. This guide walks through practical ideas you can build, style, and adjust for real small kitchens.
Why a Small DIY Kitchen Island Matters
A small kitchen island can solve several problems at once. It can add prep space, hold everyday tools, create a breakfast spot, store pans, or give an awkward open area a clear purpose. Architectural Digest notes that small islands can work as prep zones, dining spots, storage pieces, or flexible focal points, especially when wheels or compact proportions are used.
For small kitchens, the best island is not always a fixed cabinet. House Beautiful recently highlighted the return of compact freestanding cook’s tables as a warmer, more flexible alternative to oversized islands. That idea fits small homes beautifully because you can choose a piece that feels like furniture, not a bulky renovation.
Tools, Materials, and Preparation
Before choosing your DIY island, prepare the kitchen first.
- Measuring tape: Measure walkway clearance, cabinet doors, appliance doors, and traffic paths.
- Painter’s tape: Mark the island footprint on the floor before buying or building.
- Notebook or mood board: Save finishes, wood tones, hardware, and storage ideas.
- Level: Useful if you add a butcher-block top or adjust legs.
- Screwdriver and drill: Needed for casters, hooks, handles, and shelf supports.
- Sandpaper: Smooth rough wood before staining or sealing.
- Wood sealer or food-safe oil: Use on butcher-block or raw wood surfaces.
- Casters: Add wheels if you want a movable island.
- Hooks, rails, or baskets: Helpful for towels, utensils, cutting boards, and produce.
- Safety note: Secure heavy pieces, avoid blocking oven or fridge doors, and do not place heat appliances on surfaces not rated for heat.
For budget tools and beginner DIY supplies, you can internally link to DecorFixer’s guide on Amazon home-improvement products under $50.
Step-by-Step Guide
1. Measure the Kitchen Before Choosing an Island
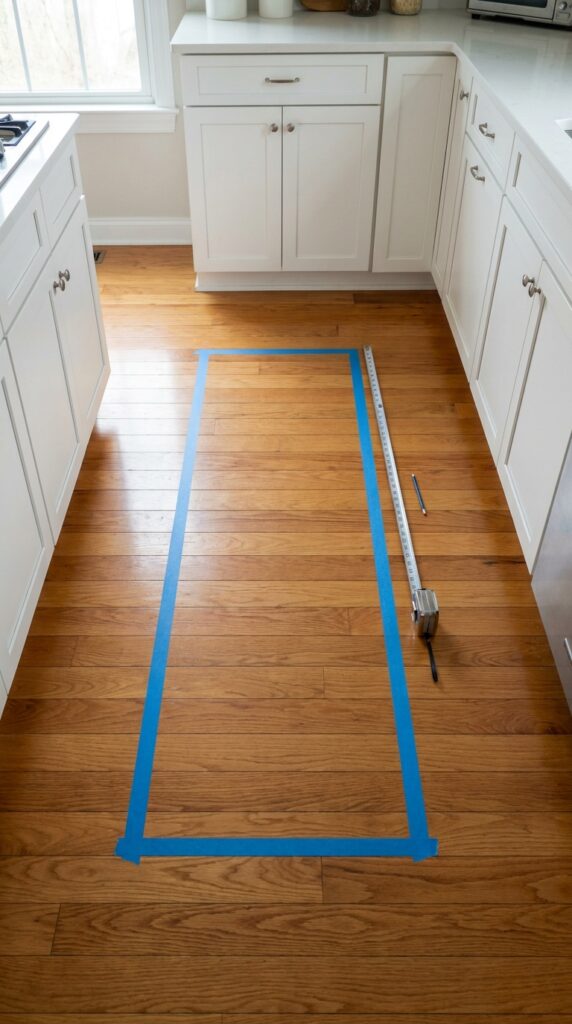
Start by measuring the open floor area where the island might go. Leave enough space to walk, open drawers, pull out chairs, and move hot pans safely. A small island should feel helpful, not like an obstacle in the middle of the room. Use painter’s tape to mark the size on the floor, then live with it for a day. Walk around it during normal cooking. Open the fridge, oven, dishwasher, and cabinets. If anything feels tight, choose a narrower piece. A common mistake is buying an island because it looks cute online, then realizing it blocks the kitchen flow.
2. Try a Rolling Kitchen Cart for Flexibility
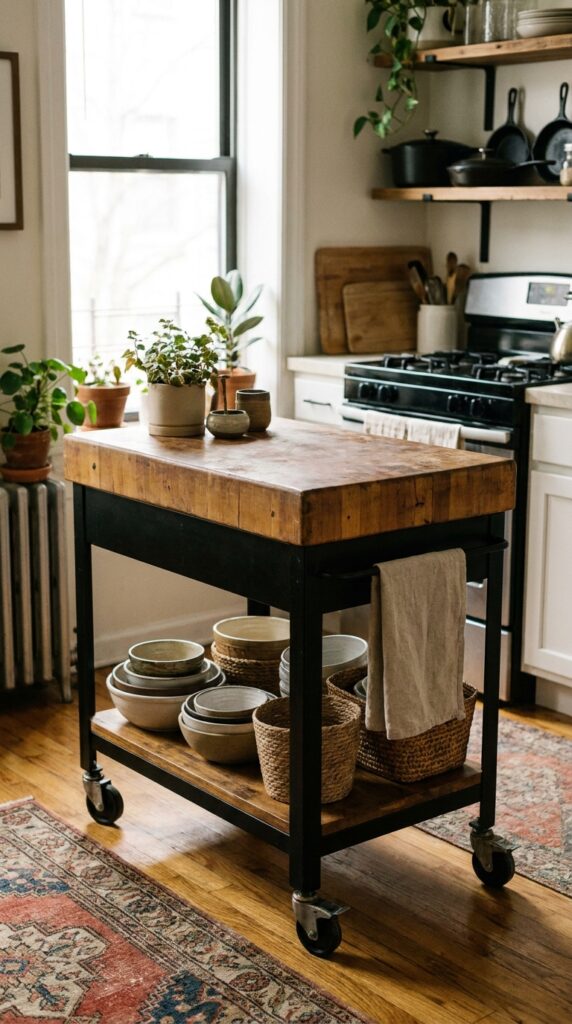
A rolling cart is one of the easiest DIY kitchen island ideas for small kitchens because it can move wherever you need it. Use it beside the stove during prep, near the table while serving, or against a wall when the kitchen needs more walking space. Choose a cart with locking wheels, a sturdy top, and at least one shelf. Wood adds warmth, while metal works well in modern or industrial kitchens. Add a basket for onions, hooks for towels, and a small tray for oils. Avoid carts that wobble, have weak wheels, or are too tall for comfortable chopping.
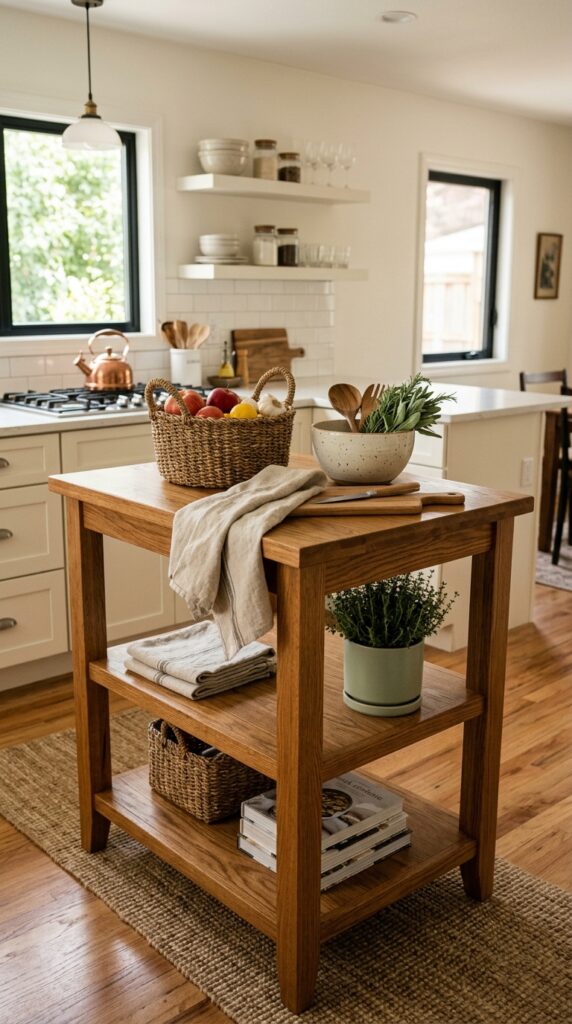
3. Turn a Small Table Into a Cook’s Island
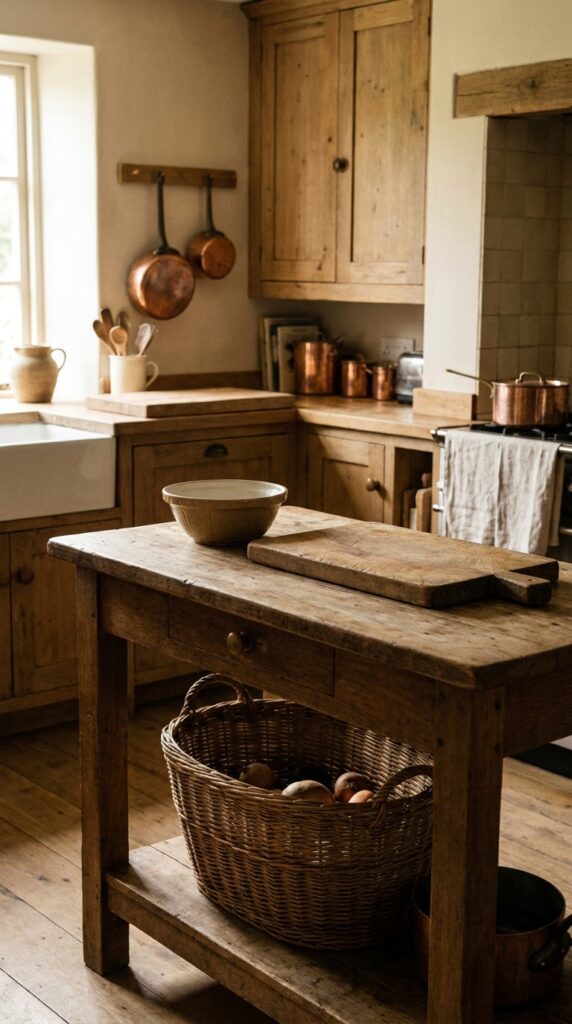
A compact wooden table can work beautifully as a soft, furniture-style island. This idea is great for renters or anyone who wants a less permanent look. Choose a table with slim legs so the floor stays visible, which helps a small kitchen feel lighter. Add a lower shelf if the table has enough support, or place woven baskets underneath for linens and produce. Seal the top if you plan to use it for food prep. The pro tip is to keep the surface mostly clear. A bowl, cutting board, and small lamp can look charming, but too many items will steal your workspace.
4. Repurpose a Dresser Into a Storage Island

A small dresser can become a useful island if the height, width, and structure fit your kitchen. Remove old hardware, sand the surface, paint or stain it, then add a sealed wood top. Drawers are perfect for towels, utensils, baking tools, placemats, and pantry extras. This idea works especially well if your kitchen lacks lower cabinets. Choose simple hardware that matches your cabinet pulls for visual harmony. Avoid using a dresser with weak joints, swollen wood, or shallow drawers that do not slide well. Also avoid placing heavy stone on top unless the piece is properly supported.
5. Build a Butcher-Block Cabinet Island
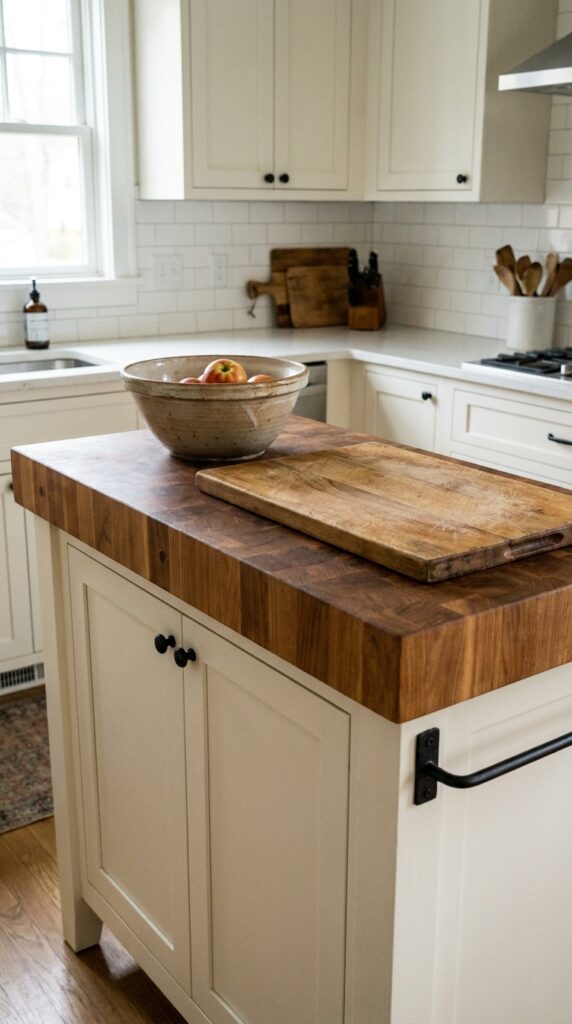
A small base cabinet with a butcher-block top can feel custom without needing a full kitchen renovation. Start with a narrow cabinet, then add a wood countertop cut to size. Seal the butcher block properly so it can handle daily use. This island gives you closed storage, a strong prep surface, and a cleaner built-in look. Paint the base in a color that matches or softly contrasts your cabinets. Warm white, sage, charcoal, and natural wood all work well in small kitchens. The mistake to avoid is making it too deep. A slim island often works better than a wide one.
6. Use Open Shelving for a Lighter Look
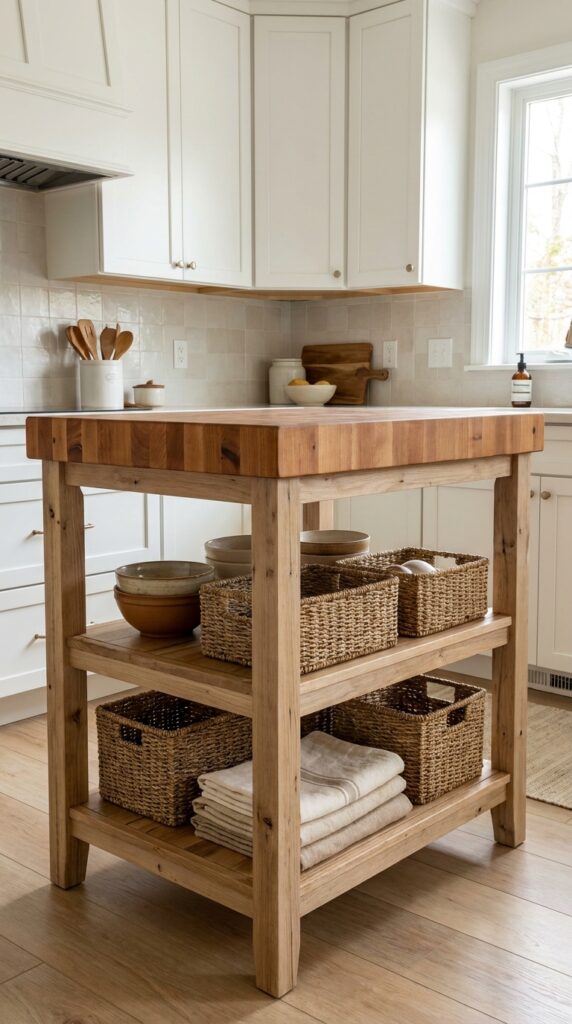
Open shelving can make a small island feel airy because it does not look as heavy as a closed cabinet. Use the shelves for items you reach for often, such as mixing bowls, cutting boards, baskets, or folded kitchen towels. Keep colors calm and repeat materials so the shelves do not look cluttered. Better Homes & Gardens covers kitchen design as a balance of storage, function, and style, which is the exact goal here. Avoid placing every small item on display. If the shelf starts looking messy, use baskets to hide smaller pieces.
7. Add Seating With a Narrow Overhang
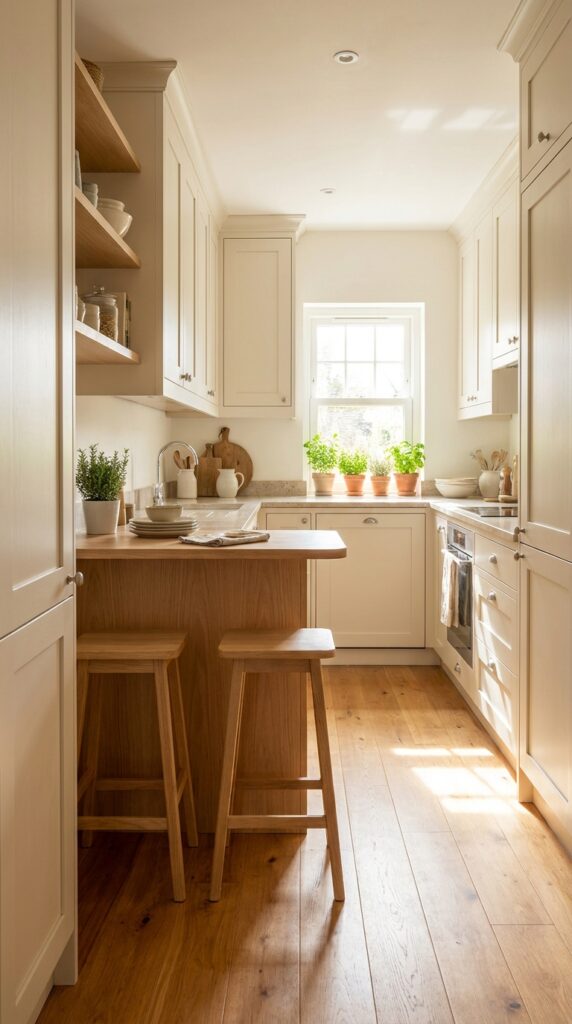
If your kitchen has enough room, add a small overhang on one side of the island for stools. Even a 10 to 12-inch overhang can create a casual breakfast spot. Choose backless stools that slide fully underneath so the walkway stays clear. This works best with a rectangular island placed parallel to cabinets or a wall. Keep the seating side away from the oven, dishwasher, and busy prep path. A common mistake is forcing seating into a kitchen that does not have enough clearance. If stools block movement, skip seating and focus on storage or prep space instead.
8. Make a Slim Island From Bookshelves
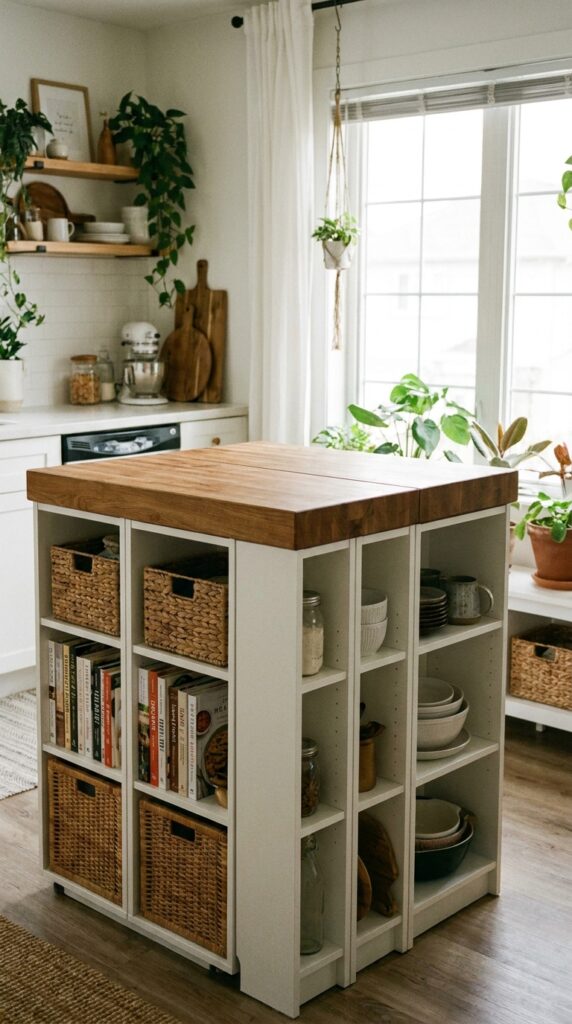
Two narrow bookshelves placed back-to-back can become a smart DIY island base. Secure them together, add a solid top, and use the cubbies for baskets, cookbooks, dishes, or pantry jars. This idea is affordable and beginner-friendly, but it needs careful assembly. Use sturdy shelves, check the weight limits, and anchor or reinforce the structure if needed. A butcher-block top, plywood top, or sealed pine board can finish the look. Style the shelves with repeated baskets to keep everything tidy. Avoid overloaded shelves, loose screws, and lightweight units that tip or shake during use.
9. Add Hooks and Rails for Vertical Storage
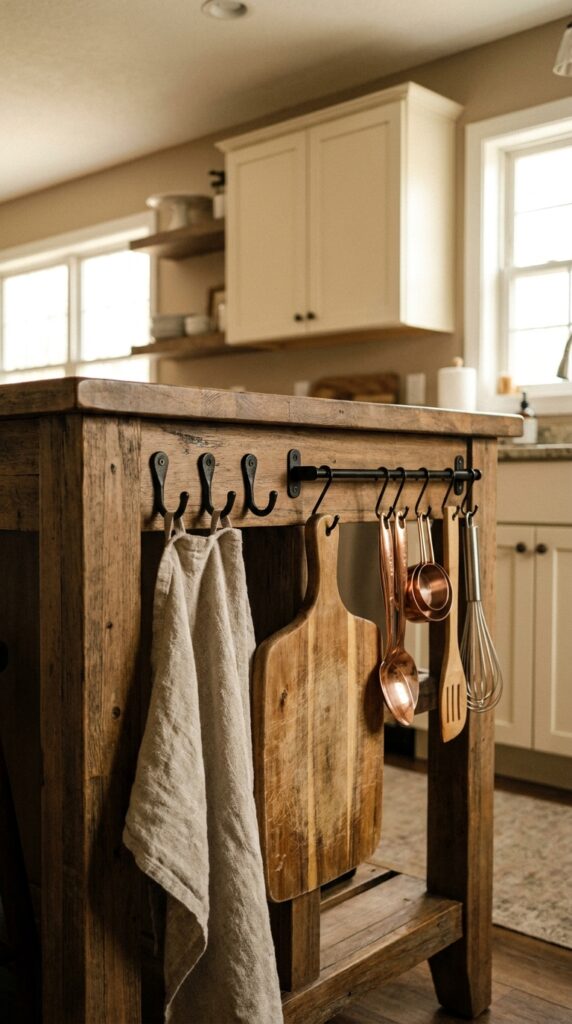
A small island becomes much more useful when the sides work too. Add hooks for towels, rails for utensils, or a side rack for cutting boards. This keeps your drawers clearer and puts daily items within reach. Choose hardware that matches your kitchen finish, such as black, brass, brushed nickel, or wood. Place hooks on the least busy side so towels do not catch on cabinets or stools. The best tip is to store only attractive, useful items here. Avoid hanging too many tools, because the island can quickly look crowded instead of practical.
10. Create a Coffee or Breakfast Island

If your kitchen already has enough prep space but lacks a morning routine zone, turn a small island into a coffee or breakfast station. Use the top for a coffee maker, tray, mugs, and a small container for spoons. Store napkins, tea, cereal, or breakfast bowls underneath. This idea works well near a wall outlet, but keep cords neat and away from water. Use a wipeable tray to protect the surface from spills. Avoid placing too many appliances on a tiny island. One main appliance looks intentional. Three or four can make the kitchen feel cramped.
11. Choose a Fold-Down or Drop-Leaf Island
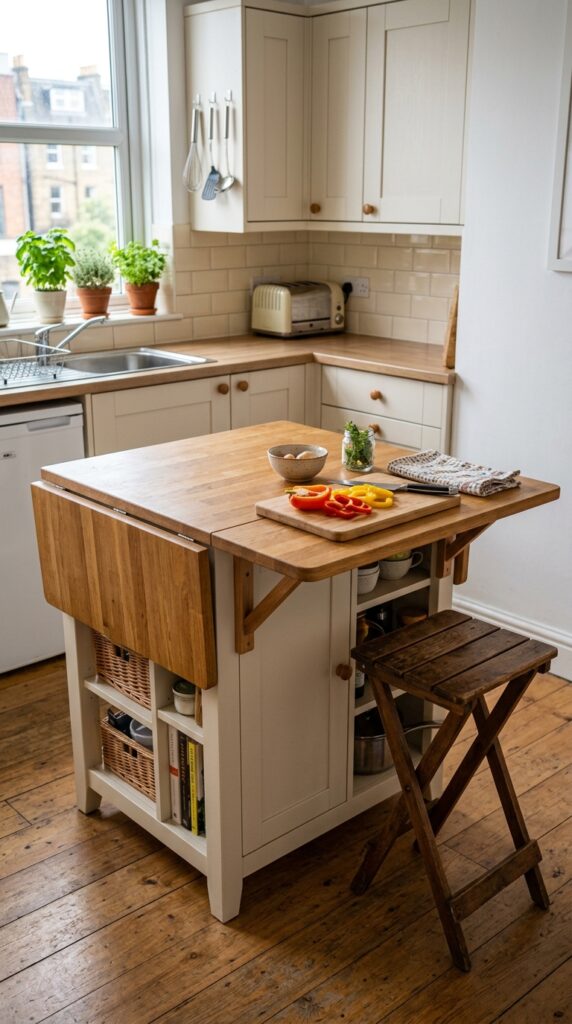
A drop-leaf island is perfect when your kitchen needs flexibility. Keep the leaf down during normal traffic, then lift it for chopping, baking, serving, or eating. This is especially useful in apartments, galley kitchens, and small open-plan homes. Look for a sturdy hinge, strong legs, and a top that does not wobble when extended. Pair it with folding stools if you want occasional seating. The main mistake is leaving the leaf open all the time when the kitchen cannot support it. The beauty of this island is that it can grow only when you need it.
12. Finish the Island With Color, Texture, and Light
Once the island is built or placed, style it so it connects with the kitchen. Repeat one color from your cabinets, backsplash, rug, or hardware. Add texture through wood grain, woven baskets, ceramic bowls, or linen towels. If the island sits near a window, keep the top simple so natural light can move across the surface. DecorFixer’s Kitchen Refresh category includes related ideas such as painting cabinets and red kitchen decor, which can guide color choices for a more connected look. Avoid decorating the island like a display table. In a small kitchen, function should lead.
Pro Tips for Small DIY Kitchen Islands
- Choose narrow over wide. A slim island usually works better than a wide one in a small kitchen.
- Use wheels when possible. Locking casters give you flexibility during cleaning, cooking, and serving.
- Keep the top clear. A small island loses value when it becomes a drop zone for mail, keys, and random items.
- Repeat kitchen finishes. Match hardware, wood tone, or paint color so the island feels connected.
- Use baskets for open storage. They hide visual clutter while keeping items easy to grab.
- Protect the surface. Seal wood, use cutting boards, and avoid hot pans unless the top is rated for heat.
- Think about daily habits. Build the island around how you cook, not just how it looks in photos.
Common Mistakes to Avoid
Choosing an Island That Is Too Large
A big island can make a small kitchen harder to use. Always test the footprint with painter’s tape before buying or building.
Ignoring Walkway Space
You need room to move, cook, open doors, and carry hot food safely. Do not block the main kitchen path.
Forgetting Storage Needs
A pretty island should still solve a real problem. Add drawers, shelves, baskets, or hooks based on your daily routine.
Using Weak Furniture
Not every table, dresser, or bookshelf can handle kitchen use. Check stability before adding a heavy top or storing dishes.
Skipping Surface Protection
Raw wood can stain, swell, or absorb spills. Seal wood surfaces and use food-safe finishes where needed.
Overdecorating the Island
Small kitchens need breathing room. A bowl, tray, or plant is enough. Keep the rest useful.
EEAT Authority Notes
For small kitchen island planning, Architectural Digest supports the idea that compact islands can serve many purposes, including prep, storage, dining, and design focus. House Beautiful’s recent coverage of cook’s tables also supports the use of smaller freestanding pieces instead of oversized built-ins. Better Homes & Gardens remains a trusted reference for practical kitchen decorating and design ideas.
Google People Also Ask FAQs
What is the best kitchen island for a small kitchen?
The best island for a small kitchen is narrow, useful, and easy to move around. Rolling carts, slim tables, drop-leaf islands, and small cabinet islands work well. Choose one that adds prep space or storage without blocking doors, drawers, or the main walkway.
Can I put an island in a very small kitchen?
Yes, but only if there is enough clearance. Mark the island size on the floor with painter’s tape first. If the layout feels tight, choose a rolling cart, wall-side island, or fold-down table instead of a fixed island.
How can I make a cheap kitchen island?
Use a small table, dresser, bookshelf, or basic cabinet as the base. Add a sealed wood top, paint the base, install hooks, and use baskets for storage. This creates a custom look without the cost of a built-in island.
Should a small kitchen island have seating?
A small kitchen island can have seating if stools fit fully underneath and do not block the walkway. If seating makes the kitchen feel crowded, skip it. Storage and prep space are usually more useful in very small kitchens.
What can I use instead of a kitchen island?
You can use a rolling cart, small cook’s table, drop-leaf table, narrow console, baker’s rack, or wall-mounted folding counter. These options give extra workspace without making the kitchen feel too full.
Conclusion
A small kitchen island should make your kitchen easier to use, not harder to move through. Start with the real problem you want to solve. Maybe you need more prep space, hidden storage, a coffee zone, or a small breakfast spot. Then choose the island style that fits your layout and daily routine.
The best DIY kitchen island ideas for small kitchens are simple, flexible, and well-scaled. A rolling cart, repurposed dresser, narrow table, or butcher-block cabinet can add comfort and function without a full remodel. Measure first, build carefully, keep the top clear, and let the island support the way you already live in your kitchen.