
A kitchen can feel old even when the cabinets still work perfectly. Maybe the color looks too dark, the doors have small chips, or the finish feels worn around the handles. Replacing cabinets can cost a lot, but learning how to paint kitchen cabinets for beginners can give your kitchen a fresh, cleaner look without a full remodel.
This project is not hard, but it does need patience. The best results come from cleaning well, sanding lightly, using the right primer, applying thin coats, and letting the paint dry fully. If you rush the prep, the paint may peel, scratch, or look uneven.
This guide walks you through the full process in a simple way. You will learn what to remove, how to clean, when to sand, how to prime, how to paint, and what mistakes to avoid.
Why Painting Kitchen Cabinets Matters
Painting kitchen cabinets is one of the most practical ways to update a kitchen when the cabinet boxes are still strong. It can make a dark kitchen feel brighter, help dated wood tones feel current, and give the room a more intentional style.
This project also lets you choose a color that fits your home. Soft white feels clean and timeless. Warm beige or greige adds a cozy look. Sage green, olive, navy, or charcoal can create a richer kitchen style. The right cabinet paint color can also work with your countertops, backsplash, flooring, and hardware.
The real value comes from the prep. Paint cannot cover grease, dust, peeling finish, or damaged wood for long. A smooth painted cabinet starts with a clean and stable surface.
Tools, Materials, and Preparation
Before you start, gather your tools so the project feels easier from the beginning.
Tools and materials:
- Screwdriver or drill for removing doors and hardware
- Painter’s tape for clean edges
- Drop cloths or plastic sheets
- Degreasing cleaner for kitchen grease
- Soft cloths and sponge
- Wood filler for dents, scratches, and old hardware holes
- Putty knife for smoothing filler
- Medium and fine-grit sandpaper
- Sanding block or orbital sander
- Tack cloth or microfiber cloth
- Cabinet primer or bonding primer
- Cabinet-grade paint, trim enamel, or durable acrylic paint
- Angled brush for corners and details
- Small foam or microfiber roller for flat areas
- Paint tray
- Painter’s pyramids or raised blocks for cabinet doors
- Labels, marker, and small bags for screws and hinges
- Gloves, mask, and eye protection
Safety note:
If your home was built before 1978 and the cabinets may have old paint, do not sand until you check for lead paint risk. Sanding older painted surfaces can create unsafe dust. Use a lead test kit or hire a lead-safe professional if you are unsure.
You can also link naturally to DecorFixer’s 15 Amazon Home-Improvement Products Under $50 article when mentioning beginner-friendly tools, painter’s tape, storage helpers, and small DIY items.
Step 1: Decide If Your Cabinets Are Worth Painting
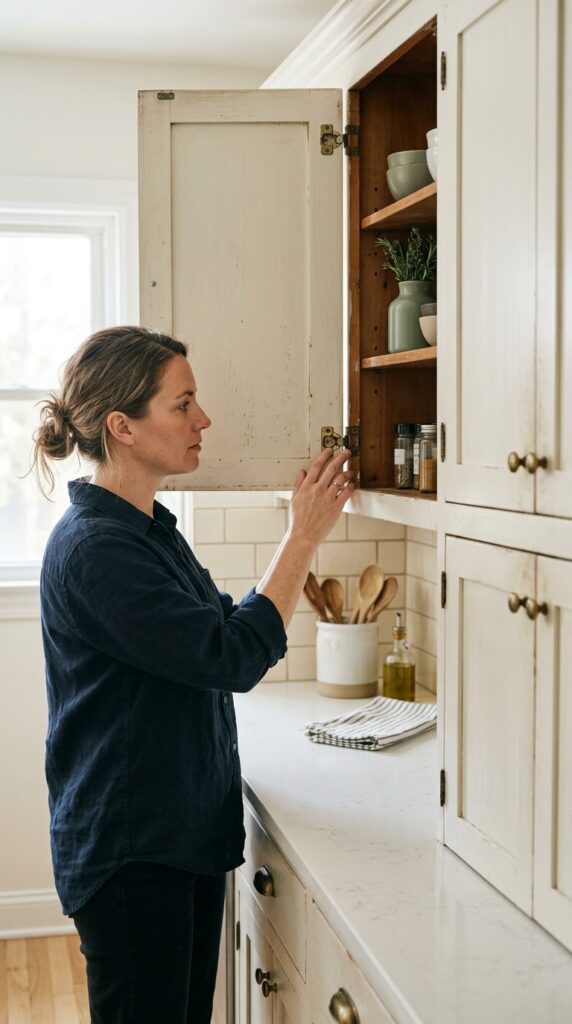
Before buying paint, check whether your cabinets are good candidates. Open the doors, inspect the boxes, and look for swelling, loose hinges, peeling laminate, water damage, or soft wood near the sink. Paint works best on solid wood, MDF, plywood, or stable previously painted surfaces.
This step matters because paint is a finish, not a fix for failing cabinets. If the cabinet surface is badly warped or peeling in large sheets, painting may only hide the problem for a short time.
Tighten loose screws and check that doors close properly. If the layout, boxes, and shelves still work well, painting makes sense. Avoid painting over damage without fixing it first. A smooth painted cabinet starts with a stable surface.
Step 2: Choose the Right Cabinet Paint Color
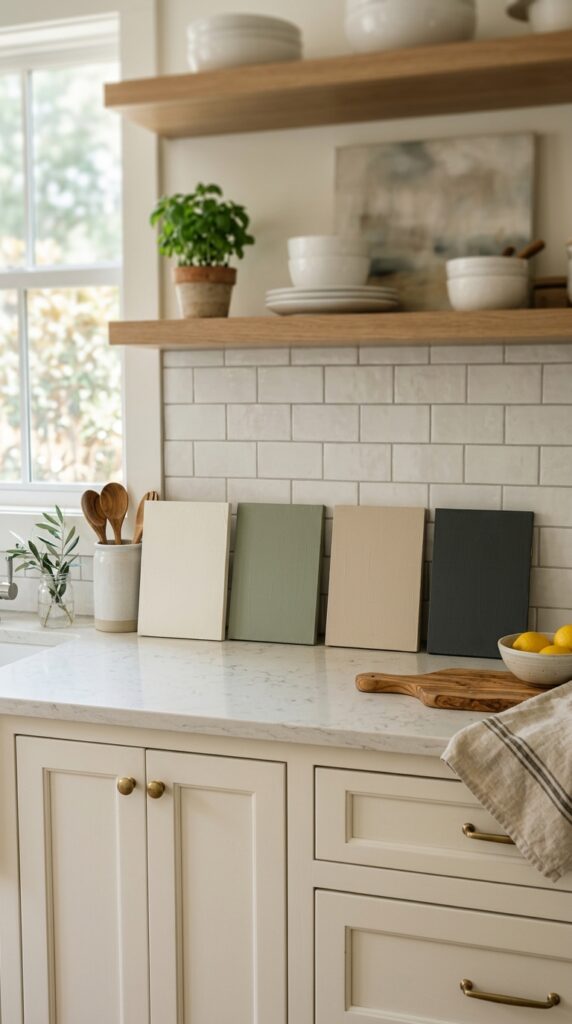
Pick your cabinet color before removing doors or buying supplies. Look at your countertops, backsplash, flooring, wall color, appliances, and natural light. White and cream are classic choices, but warm beige, soft greige, sage, olive, navy, and charcoal can also work well.
Test paint samples on poster board or spare wood. Hold them near the cabinets at different times of day. Morning light, evening light, and artificial kitchen lighting can change how a color looks.
A common beginner mistake is choosing paint from a tiny swatch. A shade that looks warm in the store may look yellow or gray at home. Larger samples help you see the undertone before you commit. For color inspiration, you can link to DecorFixer’s 13 Red Kitchen Decor Ideas article.
Step 3: Remove Cabinet Doors, Drawers, and Hardware
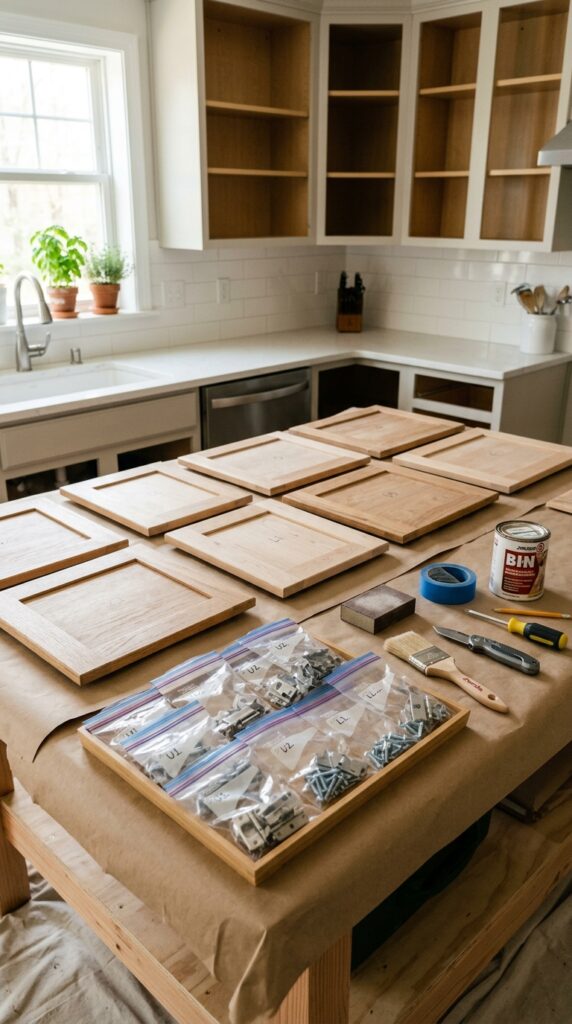
Take off the cabinet doors, drawer fronts, knobs, pulls, and hinges before painting. This takes extra time, but it helps you paint cleaner edges and avoid drips around hardware. It also makes sanding, priming, and painting much easier.
Label each door and drawer as you remove it. A simple number system works well. Place one small piece of painter’s tape inside the cabinet opening and another matching piece on the door. Put hinges and screws in labeled bags.
Do not stack removed doors directly on top of each other. They can scratch or transfer dirt. Lay them flat on a protected surface with enough room to work. This small organization step will save you a lot of stress during reassembly.
Step 4: Clean Every Surface With Degreaser
Kitchen cabinets collect grease, steam, fingerprints, food splashes, and dust. Even cabinets that look clean can have a thin oily layer that keeps primer from sticking. Use a cabinet-safe degreasing cleaner and wipe every door, drawer front, frame, corner, and edge.
Pay extra attention to cabinets near the stove, sink, trash area, and handles. These spots usually have the most buildup. After cleaning, wipe away any cleaner residue if the product instructions say to do so. Let everything dry fully before sanding.
Do not soak wood or MDF. A damp cloth is enough. Too much water can swell seams and edges. A common mistake is sanding before cleaning. That can push grease into the surface instead of removing it.
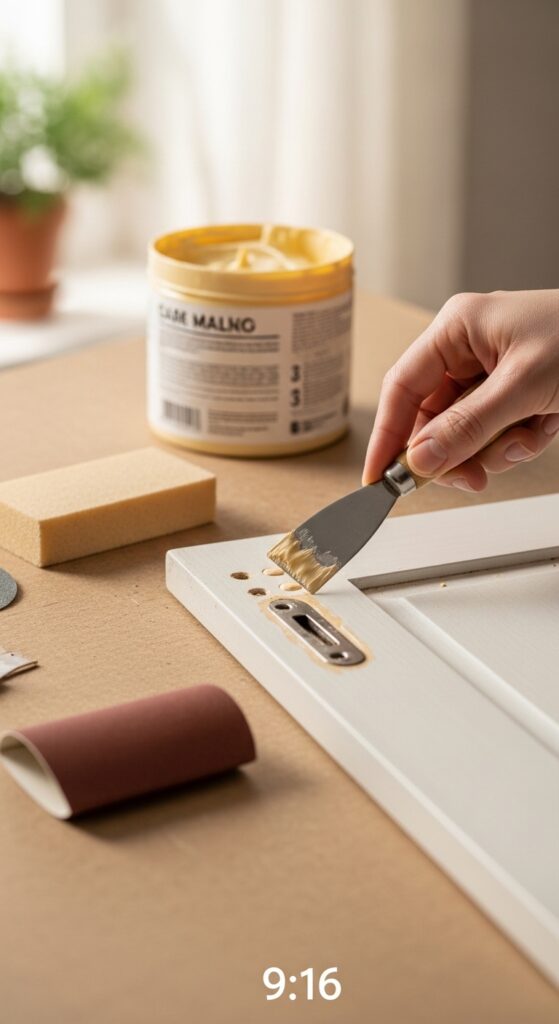
Step 5: Fill Dents, Scratches, and Old Hardware Holes
Once the cabinets are clean and dry, check for dents, scratches, small holes, and uneven spots. Use wood filler to repair damaged areas. Apply it with a putty knife and smooth it as flat as possible. Let it dry fully before sanding.
This step matters because paint can make small flaws more visible, especially when light hits the cabinet doors. If you plan to replace knobs with longer pulls, measure carefully and fill old holes before drilling new ones.
Avoid applying one thick layer of filler. Thick filler takes longer to dry and needs more sanding. Use thin layers and build up only where needed. Do not paint over filler while it is still soft. That can leave rough spots under the final paint.
Step 6: Sand the Cabinets for Better Grip
Sanding helps primer stick to the cabinet surface. You usually do not need to sand down to bare wood. Most beginner cabinet projects only need light scuff sanding to dull the glossy finish. Use a sanding block for flat areas and folded sandpaper for corners and door details.
After sanding, remove dust with a vacuum, tack cloth, or clean microfiber cloth. Dust left behind can mix with primer and create a gritty finish.
Do not sand too hard on thin veneer or laminate. You only want to rough up the surface slightly, not damage it. Also, if your cabinets may have old lead paint, stop before sanding and check safety guidance first. Proper prep helps the paint last longer.
Step 7: Tape and Protect the Kitchen
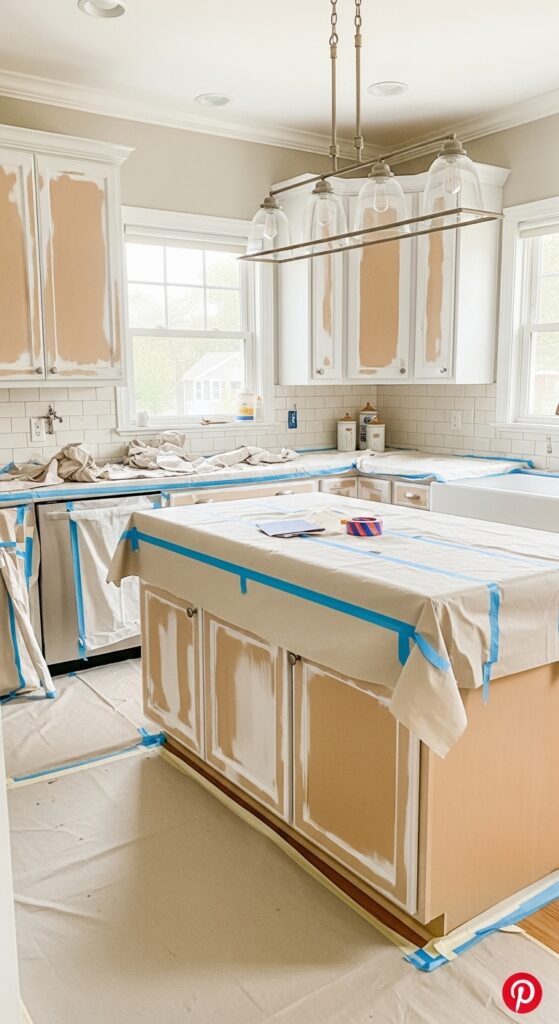
Before priming, protect the parts of the kitchen you are not painting. Use painter’s tape where cabinet frames meet walls, backsplash, countertops, floors, and appliances. Cover counters, floors, and nearby surfaces with drop cloths or plastic sheets.
This step saves cleanup time and keeps the paint lines clean. It also protects surfaces you use every day from sanding dust, primer, and paint splatter. Remove small appliances, towels, rugs, and open food items from the area.
Avoid taping over dusty or greasy surfaces because the tape may not stick well. Press the tape edge down firmly, but do not leave it on too long after painting. Remove it carefully based on the tape instructions for the cleanest edge.
Step 8: Apply the Right Primer
Primer helps paint stick and creates a smoother base. It can also help block stains, dark wood tones, or old finishes from showing through. Choose a primer made for cabinets, trim, glossy surfaces, or your specific cabinet material.
Use an angled brush for recessed details and a small roller for flat areas. Apply thin, even coats. Let the primer dry fully, then check for rough spots, drips, or stain bleed-through. If dark areas still show, apply a second thin coat of primer.
Do not apply primer too thick. Heavy primer can leave brush marks and soft edges. A thin coat dries better and sands more smoothly. If you are unsure which primer to choose, ask a paint store professional and mention your cabinet surface type.
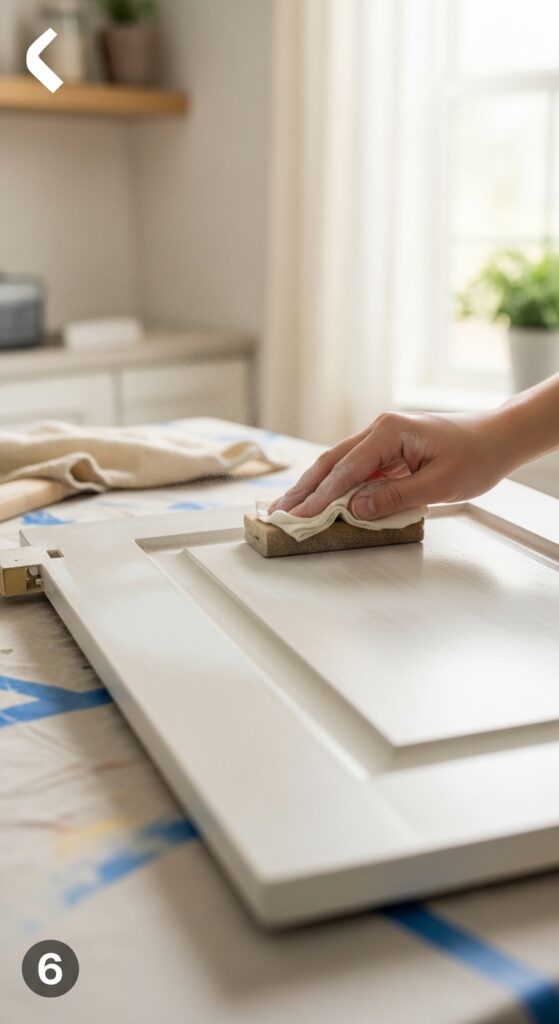
Step 9: Lightly Sand After Primer
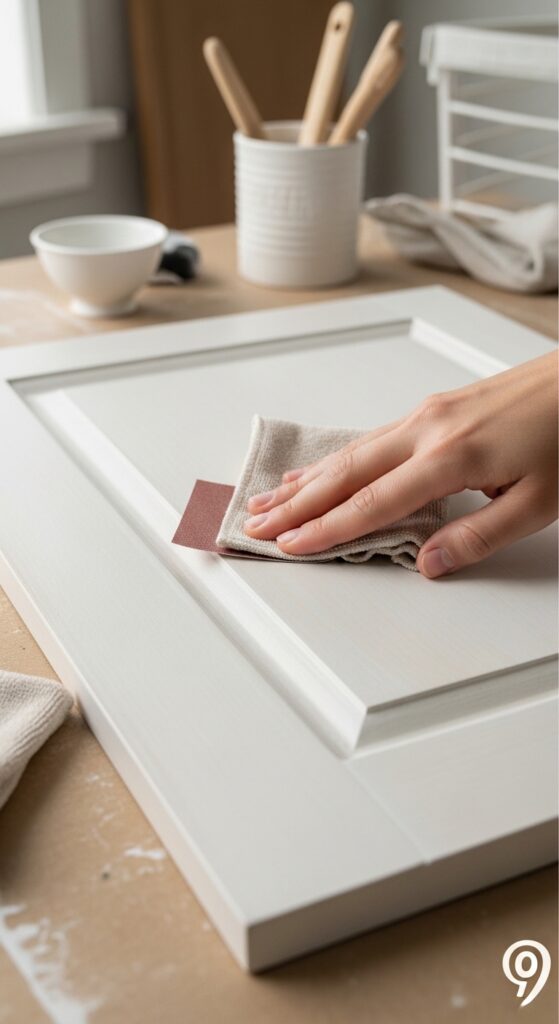
After the primer dries, lightly sand it with fine-grit sandpaper. This removes small dust bumps, brush marks, and rough texture. The goal is not to remove the primer. You only want to make the surface feel smooth before painting.
Wipe the cabinet doors, drawer fronts, and frames again with a tack cloth or microfiber cloth. This step may feel small, but it can make the final painted finish look much cleaner.
A common mistake is skipping this step because the primer already looks fine. Cabinets are touched often, so texture matters. If the primer feels rough, the paint will also feel rough. Gentle sanding helps the paint glide on better.
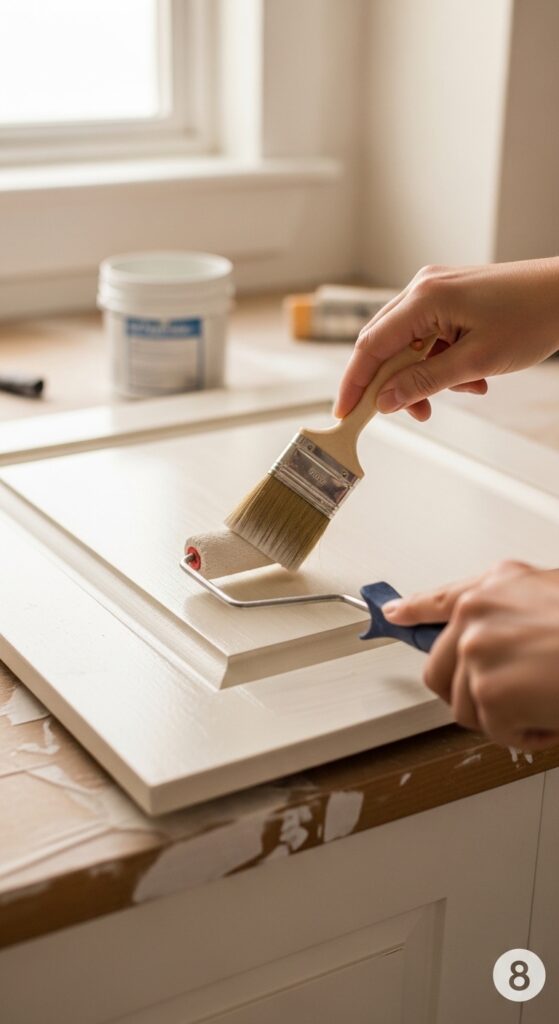
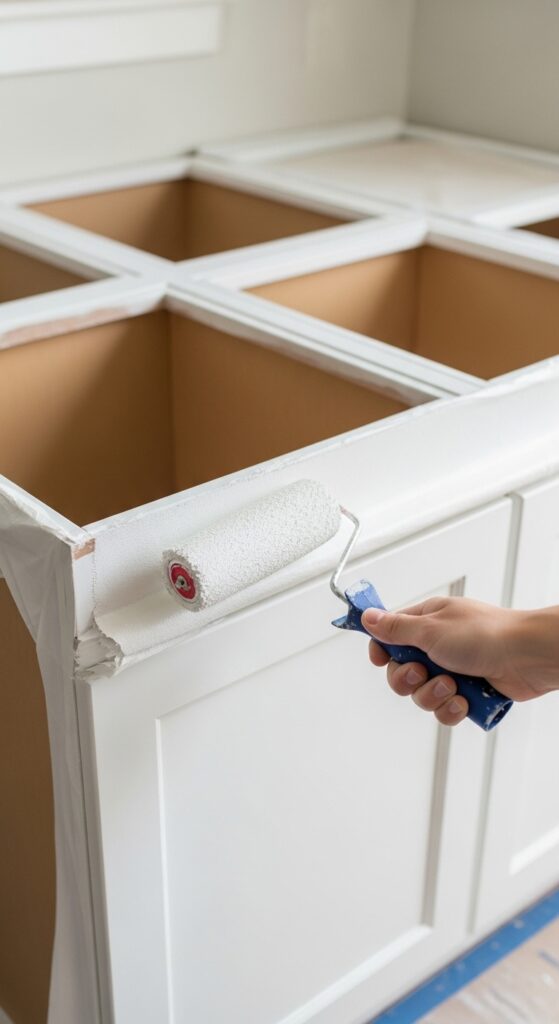
Step 10: Paint the First Thin Coat
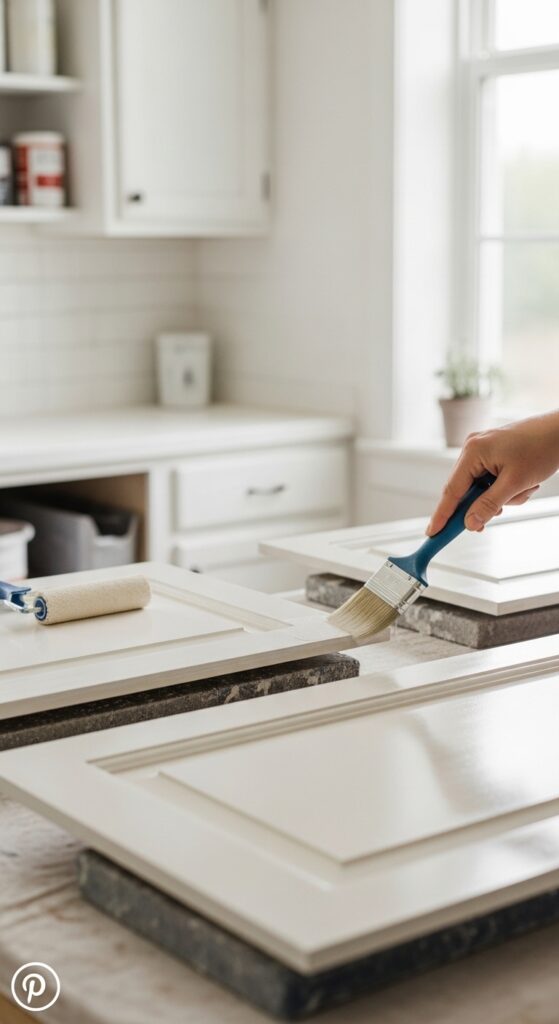
Now apply the first coat of cabinet paint. Start with the detailed areas using an angled brush, then use a small roller for flat sections. Work in thin layers and keep your strokes smooth. Follow the cabinet door shape or wood grain where possible.
The first coat may look uneven, and that is normal. Do not try to cover everything in one heavy coat. Thick paint can drip, pool in corners, and leave brush marks.
Watch the edges carefully. Paint can collect along corners, door profiles, and inside panels. If you see a drip, smooth it right away while the paint is still wet. Avoid brushing back over paint once it starts to dry because that can create streaks.
Step 11: Add the Second Coat and Check Coverage
Let the first coat dry according to the paint label. Then apply a second thin coat using the same method. Brush details first, then roll the flat areas. Most kitchen cabinets need at least two coats for even color and better durability.
If you are painting dark cabinets a light color, you may need a third coat. Deep colors can also need extra coverage. Let each coat dry fully before adding the next one.
Do not rush this step. Paint can feel dry to the touch before it is ready for another coat. Painting too soon can make the finish soft, streaky, or uneven. Thin coats and proper drying time give the cabinets a stronger finish.
Step 12: Let the Paint Cure Before Reassembly
Dry paint and cured paint are different. Dry paint can be touched. Cured paint is harder and better able to handle daily kitchen use. Check the paint label for cure time because some paints need several days or longer to fully harden.
Reattach doors, drawer fronts, hinges, knobs, and pulls carefully. Use your labels so each door goes back to the correct cabinet opening. Add soft cabinet bumpers to prevent fresh paint from sticking or slamming against the frame.
Do not scrub the cabinets too soon. Also avoid leaning heavy objects against freshly painted doors. Waiting can feel slow, but it protects your hard work. The final cure time helps the finish last longer.
Pro Tips for Better Cabinet Painting
Use cabinet-grade paint.
Cabinets need paint that can handle touching, wiping, moisture, and daily use. Avoid basic wall paint because it may not be durable enough.
Paint doors flat when possible.
Laying doors flat helps reduce drips and gives the paint time to level out.
Keep coats thin.
Thin coats dry better, look smoother, and cure stronger than thick coats.
Upgrade old hardware.
Fresh pulls, knobs, or hinges can make painted cabinets look more complete.
Save leftover paint.
Keep a small labeled jar for future chips or touch-ups.
Improve airflow.
Open windows when possible and follow the paint label’s safety instructions.
Test first.
Try your primer and paint on a hidden area before painting every cabinet.
Common Mistakes to Avoid
Painting over grease
Grease stops primer and paint from sticking. Always clean cabinets before sanding, priming, or painting.
Skipping labels
Cabinet doors can look the same but fit slightly differently. Label every door, drawer, hinge, and screw bag.
Using the wrong paint
Wall paint is not the best choice for cabinets. Use durable cabinet, trim, or enamel paint.
Applying thick coats
Heavy coats cause drips, rough texture, and slow drying. Use thin coats for a smoother finish.
Skipping primer
Primer helps paint grip and can stop stains from showing through. Do not skip it on glossy, stained, or dark cabinets.
Reassembling too early
Fresh paint can stick, dent, or peel if doors are installed before the finish hardens.
Ignoring lead paint risk
Older painted surfaces may need special safety steps before sanding. Test first if the cabinets may have old paint.
EEAT Authority References
For a stronger article, add 2–3 trusted external links where they fit naturally. You can link to:
- Architectural Digest cabinet painting guide when discussing cabinet prep and why painting is a cost-friendly kitchen update.
- Sherwin-Williams cabinet painting guide when discussing cleaning, sanding, priming, and application tools.
- EPA lead-safe renovation guidance when discussing sanding safety for older homes.
For internal links, add DecorFixer links where they match the topic:
- Link to 15 Amazon Home-Improvement Products Under $50 in the tools section.
- Link to 13 Red Kitchen Decor Ideas in the color inspiration section.
- Link to the Kitchen Refresh category near the introduction or conclusion.
Google People Also Ask FAQs
Can beginners paint kitchen cabinets?
Yes, beginners can paint kitchen cabinets if they follow the right process. The most important steps are cleaning, sanding, priming, using thin paint coats, and allowing enough drying time. You do not need advanced skills, but you do need patience and careful prep.
Do I have to sand cabinets before painting?
Most cabinets should be lightly sanded before painting, especially if they have a glossy finish. Sanding helps primer grip the surface. You usually do not need to sand to bare wood. If your home is older, check for lead paint risk before sanding.
What kind of paint is best for kitchen cabinets?
Use durable cabinet paint, trim enamel, or acrylic paint made for high-touch surfaces. Satin and semi-gloss finishes are popular because they are easier to wipe than flat paint. Avoid basic wall paint because cabinets face more wear, moisture, and daily handling.
Can I paint kitchen cabinets without removing the doors?
You can, but it is not the best method. Removing doors and drawer fronts helps you paint edges, avoid drips, and get a smoother finish. It also makes cleaning, sanding, priming, and drying easier for beginners.
How long should painted cabinets cure?
Cure time depends on the paint, temperature, humidity, and number of coats. Many cabinet paints need several days or longer to fully harden. Follow the paint label, avoid scrubbing early, and use soft cabinet bumpers to protect the new finish.
Conclusion
Learning how to paint kitchen cabinets for beginners is mostly about doing the steps in the right order. Clean first, sand lightly, prime well, paint thin coats, and give the finish enough time to harden. These simple habits can help your cabinets look smoother and last longer.
Start with a clear color plan and a realistic schedule. Give yourself space to remove doors, label parts, and let each coat dry without stress. Your kitchen does not need a full remodel to feel fresh again. With careful prep and steady work, painted cabinets can bring new life to the room you use every day