
You walk into the kitchen after a power cut, glance at your oven, and there it is: the clock is flashing, wrong, or stuck at 00:00. It feels like a small issue until you need the oven timer for dinner, baking, or a busy morning routine. Learning how to set clock on Bosch oven can save you from wrong cooking times and daily annoyance.
Bosch ovens come with different control panels. Some use simple clock buttons, some use plus and minus keys, and newer models may use touch controls or a settings menu. That means one method may not fit every oven. The good news is that most Bosch oven clocks follow a similar pattern: enter clock mode, adjust the time, then confirm the setting. This guide walks you through the process in a clear, safe, beginner-friendly way.
Why Setting the Bosch Oven Clock Matters
A correct oven clock does more than make your kitchen look organized. It helps your timer, cooking duration, delayed start, and end-time features work correctly. If the clock is wrong after a power outage, your oven may still heat normally, but time-based functions can confuse you. This matters most when baking, roasting, meal prepping, or using the oven while doing other tasks.
A wrong display can also make the control panel feel harder to use. Many people press the timer button by mistake and wonder why the actual clock does not change. Setting the clock properly keeps your oven simple, predictable, and easier to use. If your Bosch model has a different button layout, the same basic idea still applies: find the clock setting, adjust the time, and save it.
Tools, Materials, and Preparation
You usually do not need tools to set a Bosch oven clock. Before you start, prepare these simple things:
- Your Bosch oven model number: Check the oven door frame, side edge, manual, or appliance label.
- User manual: Helpful if your oven has a touchscreen, dial menu, or Series 8 style controls.
- Clean, dry hands: Touch panels may not respond well to wet fingers.
- Stable power connection: Make sure the oven has power and the display is on.
- Control panel view: Stand close enough to see the clock symbol, timer symbol, plus/minus keys, menu button, or settings button.
- Safety note: Do not remove panels, open wiring, or attempt electrical repair just to fix the clock.
For more simple home setup ideas, add an internal link to DecorFixer’s Beginner Tools or Kitchen Refresh section.
Step-by-Step Guide: How to Set Clock on Bosch Oven
Step 1: Check Whether the Oven Display Is Flashing
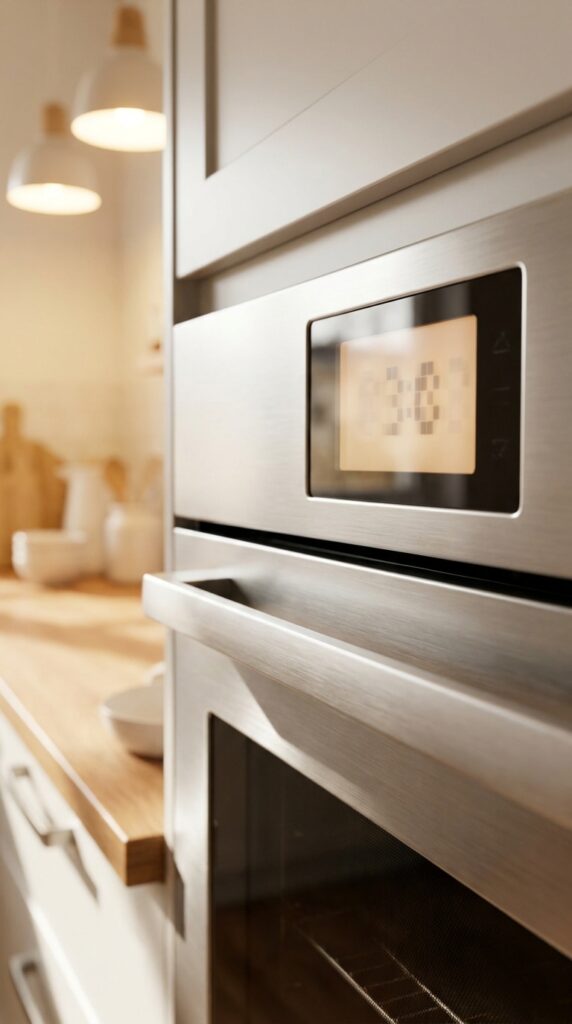
Start by looking at the oven display. If it flashes 00:00, shows the wrong time, or blinks after a power outage, the oven is asking you to set the clock. This is common after first installation, unplugging the appliance, or a power cut. A flashing display usually means the clock has lost its saved time.
Do not press random buttons too quickly. Take a few seconds to study the panel. Look for a clock icon, timer icon, plus and minus buttons, arrow keys, or a settings menu. The common mistake is trying to cook before clearing the flashing clock. Some models still work, but timer functions may feel confusing until the clock is set.
Step 2: Make Sure the Oven Is Not Actively Cooking
Before changing the time, make sure the oven is not running a heating program. Turn the function selector to off, cancel any timer, or stop the current program if needed. This helps the control panel focus on clock settings instead of cooking duration, end time, or timer mode.
On some Bosch ovens, the same button controls several time features. If the oven is on, pressing the time button may open cooking duration instead of the main clock. If the oven is off, the same button may allow clock setting. A useful tip is to wait until the oven fan stops and the display returns to standby. Avoid changing settings while the oven is hot unless your manual says it is safe.
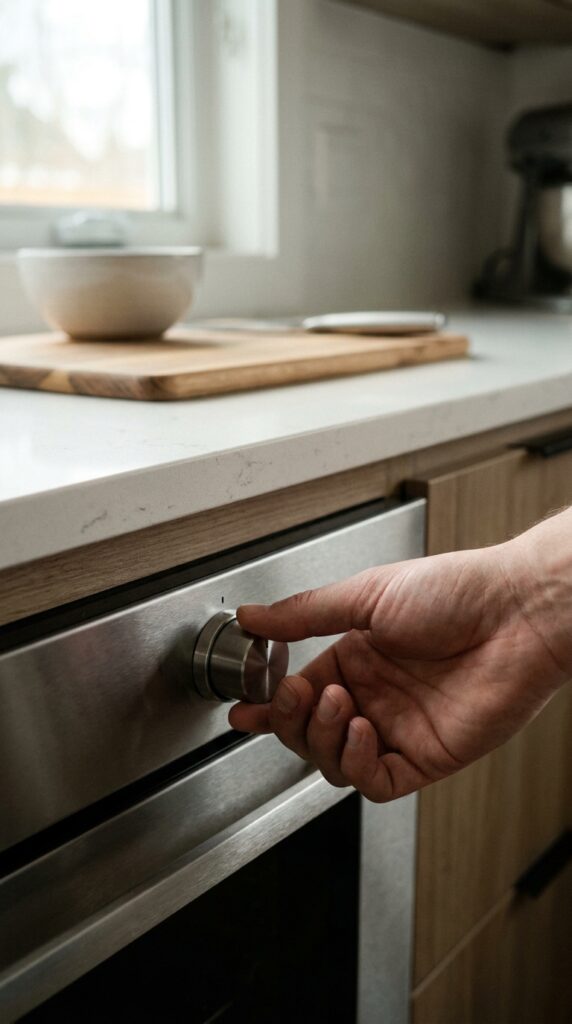
Step 3: Find the Clock, Time, or Settings Button
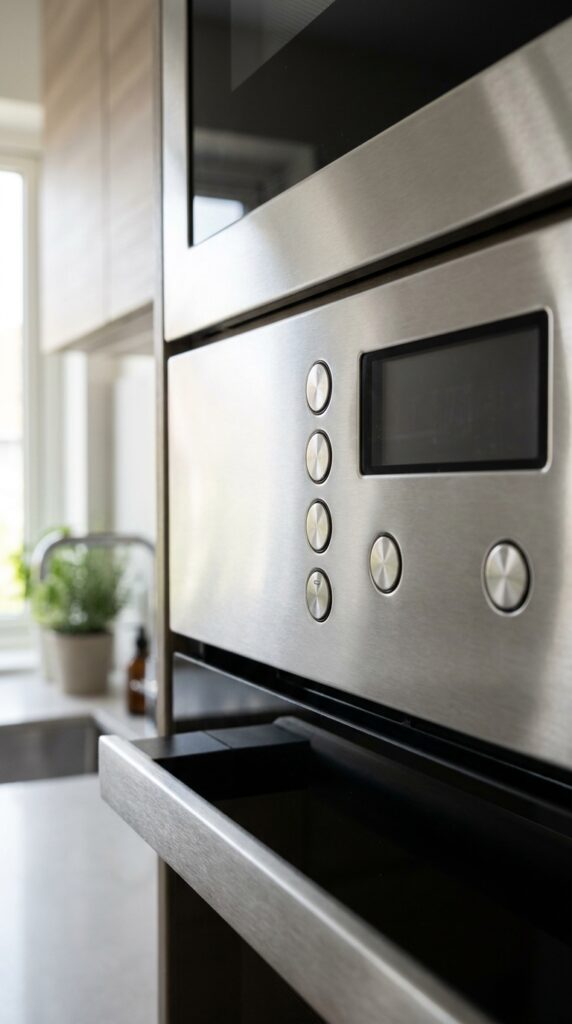
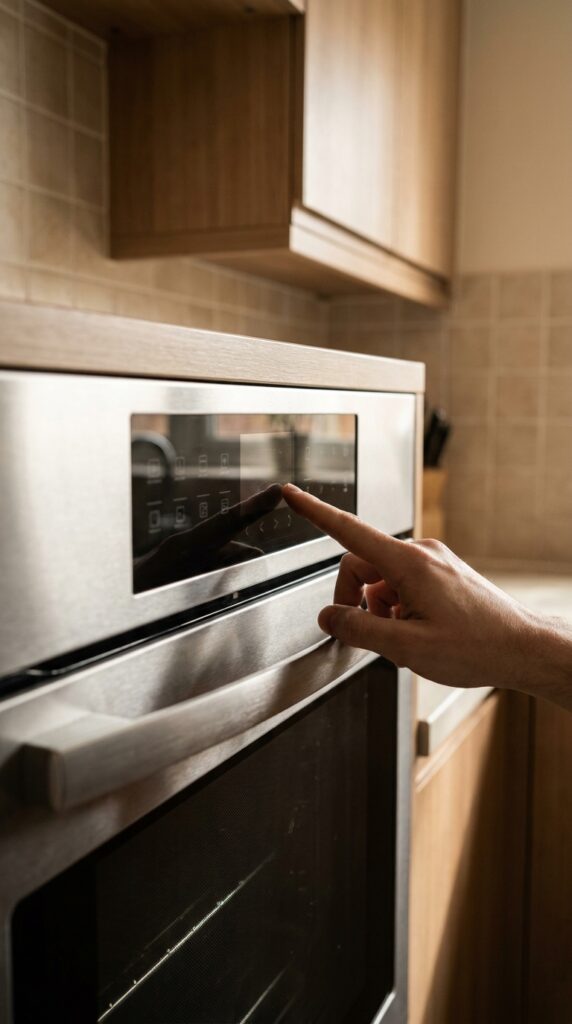
Now look for the correct button. Older Bosch ovens often have a clock symbol or a button marked with time functions. Some models use a small clock icon, while others use a general settings button. Newer touch-control ovens may place clock settings inside a menu.
Pressing the wrong button usually opens the minute minder or timer, not the actual oven clock. That is the most common point of confusion. If your panel has both a bell symbol and a clock symbol, remember that the bell usually means alarm or timer. The clock symbol usually controls the time of day. If your model has no clear clock icon, use the manual and look for “time setting options” or “basic settings.”
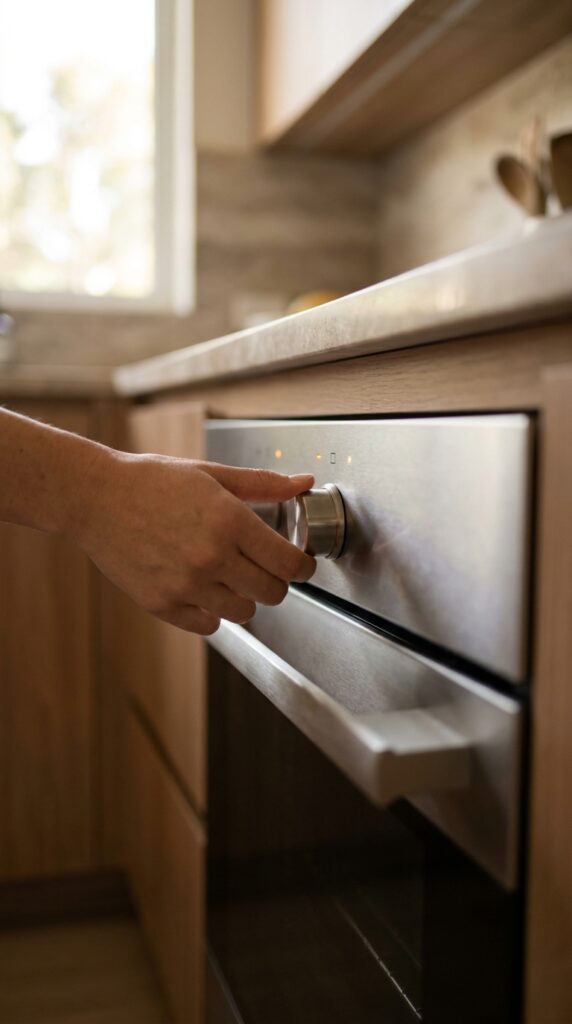
Step 4: Enter Clock Setting Mode
Once you find the clock or time button, press it until the clock digits start flashing. On many models, you may need to press the button more than once because the oven cycles through timer, cooking time, end time, and clock. Stop when the display shows the clock setting or when the time digits blink.
If your Bosch oven uses a menu system, open settings and look for time, clock, or display time. Some touch models require you to hold a menu or information button before clock settings appear. Do not force the controls. If nothing changes, pause and check the model manual. A common mistake is holding plus or minus first before entering clock mode. Adjust buttons usually work only after the oven is ready to edit the time.
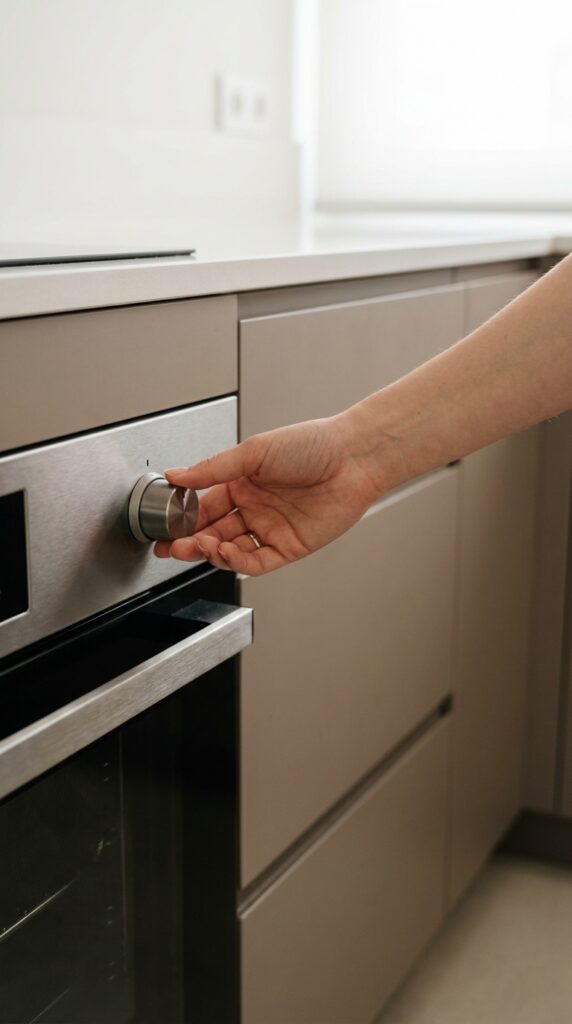
Step 5: Set the Hour First
After the clock display starts flashing, adjust the hour. Use the plus and minus buttons, arrow keys, rotary selector, or touch slider depending on your oven. Move slowly at first so you can see how the panel responds. Some ovens change faster when you hold the button down.
Set the hour carefully, especially if your oven uses 12-hour time with AM and PM. A wrong AM/PM setting can affect delayed cooking or reminder features. If your oven uses 24-hour format, check that 18:00 means 6 PM, not 6 AM. Avoid rushing through this step because one wrong hour can make the whole setting feel off later. Once the hour looks correct, move to the minutes.
Step 6: Set the Minutes Accurately
Use the same adjustment buttons or selector to set the minutes. This step seems simple, but it is where many people overshoot the time by holding the button too long. Tap gently if the numbers move fast. If your oven has a rotary dial, turn it slowly until the correct minute appears.
Minutes matter when you bake, roast, or use the oven timer often. A few minutes may not seem like much, but it can affect your routine when you rely on the oven display as your kitchen clock. The pro tip is to match the oven to your phone clock so every appliance in the kitchen feels consistent. Avoid setting the clock “close enough” if you use timed cooking features.
Step 7: Confirm the Clock Setting
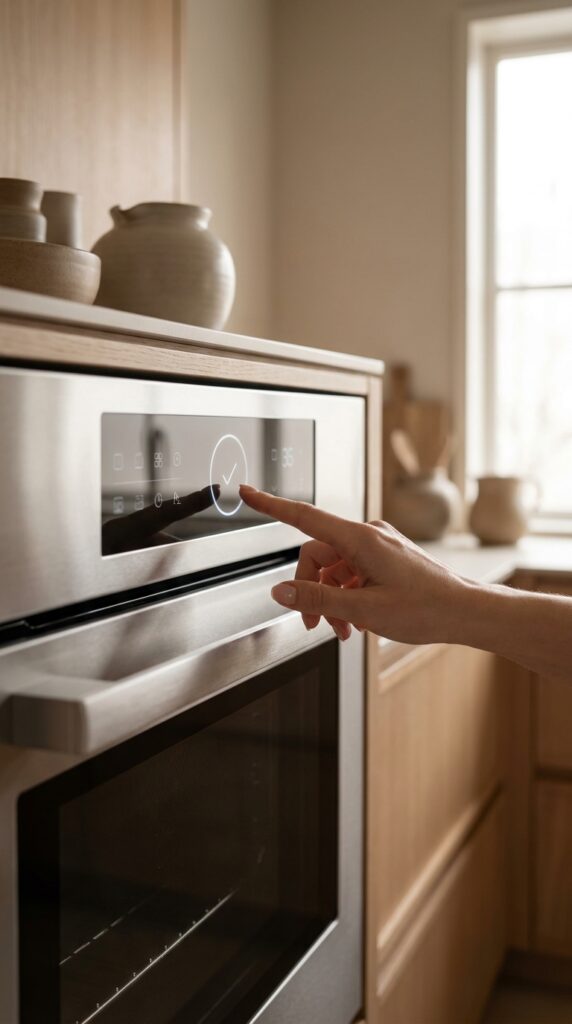
After the correct time appears, confirm it. Some Bosch ovens save the time when you press the clock button again. Others save automatically after a few seconds. Newer models may need an OK, start, tick, or menu confirmation.
Watch the display after confirming. If the numbers stop flashing and the time stays visible, the oven likely saved the clock. If the display returns to the old time, you may not have confirmed the setting. The common mistake is walking away before the setting is saved. Wait a few seconds and check the display again. If it remains steady, you can trust that the clock is active.
Step 8: Check the Timer Is Not Still Running

After setting the clock, check that you did not accidentally turn on a timer or alarm. Look for a bell icon, countdown symbol, cooking duration icon, or end-time symbol. If any timer icon remains active, cancel it unless you need it.
This step matters because timer mode and clock mode often share similar buttons. Many users think they set the clock, but they actually set a countdown timer. If the oven beeps later for no reason, this is often why. To fix it, press the timer or clock button until you reach the active timer, then reduce it to zero or cancel it according to your model. Avoid ignoring small symbols on the display because they often explain what the oven is doing.
Step 9: Test the Clock After One Minute
Once the clock is set, leave it for one minute and check if the time moves forward correctly. This quick test confirms that the oven saved the time and the display is working as expected. If the time stays frozen, flashes again, or resets to 00:00, the setting may not have saved.
A stable clock means you can use timer and cooking features with more confidence. If the display keeps resetting, check whether the oven loses power, the plug is loose, or the breaker has an issue. Do not open the oven body or touch internal electrical parts. The safe move is to check the manual, confirm power, and contact Bosch support or a qualified technician if the issue repeats.
Step 10: Adjust 12-Hour or 24-Hour Format If Needed

Some Bosch ovens display time in 24-hour format, while others use 12-hour time. If you prefer one style, check your settings menu or manual for clock format options. Not every model offers this feature, so do not assume your oven can switch formats.
If your oven shows 13:30, that means 1:30 PM in 24-hour format. If it shows AM or PM, make sure the label matches the real time. This helps avoid confusion with delayed start or end-time settings. The common mistake is trying many button combinations to change the format without checking the manual. That can activate child lock, timer, or other settings by accident.
Step 11: Reset the Clock After a Power Cut
If your kitchen loses power, your Bosch oven may ask for the time again. This is normal on many appliances. When power returns, wait until the display becomes stable, then repeat the clock-setting process. If the oven display flashes 00:00, treat it like a new setup.
Do not keep switching the power off and on unless you need to reset an unresponsive display. Power cycling too often can cause more confusion, especially if the oven was recently hot. If the display does not respond after power returns, check the breaker and make sure the appliance is properly connected. If other kitchen appliances work but the oven does not, contact official support or a qualified appliance technician.
Step 12: Use the Manual for Model-Specific Controls
Bosch ovens have many designs, including built-in ovens, freestanding cookers, Series 4, Series 6, Series 8, and touch-control models. That is why exact button names can vary. If your panel does not match the steps above, use your model number to find the official manual.
Look for manual sections named “Setting the clock,” “Time-setting options,” “Basic settings,” or “Initial use.” This is the safest way to avoid wrong button combinations. You can also check the official Bosch support page if the oven will not respond. The common mistake is following a guide made for a different model. Use general steps for direction, but trust your model manual for exact controls.
Pro Tips for Setting a Bosch Oven Clock
- Take a photo of your control panel before searching online. It helps you match your oven to the right instructions.
- Check the model number before using any video tutorial. Bosch panels can look similar but work differently.
- Do not confuse the bell icon with the clock icon. The bell often controls the alarm or minute minder.
- Wait for the display to stop flashing before assuming the time saved.
- Use your phone as the reference time so the oven clock matches your daily routine.
- Keep the manual in a kitchen drawer or save a digital copy on your phone.
- Call support if the clock resets again and again. Repeated resets can point to a power or control issue.
Common Mistakes to Avoid
Pressing the Timer Instead of the Clock Button
Many Bosch ovens place timer and clock functions close together. If you press the timer button, you may set an alarm instead of the real clock. Look for the clock symbol or cycle through time options until the time of day flashes.
Not Confirming the Time
Some ovens save automatically, but others need a button press. If you walk away too soon, the oven may return to the old display. Always wait until the digits stop flashing.
Ignoring AM and PM
If your oven uses 12-hour format, check AM and PM carefully. A wrong label can confuse delayed cooking features and make the display feel wrong all day.
Following Instructions for the Wrong Model
A Series 8 touchscreen oven may not work like an older push-button model. Always match the advice to your control panel and model number.
Resetting Power Too Quickly
Turning the breaker off and on may help an unresponsive display, but it should not be your first step. Try normal clock settings first, then check power only if the panel does not respond.
Pressing Too Many Buttons at Once
Random button combinations can activate child lock, timer, or hidden settings. Press slowly and watch the display after each action.
Skipping the Manual
The manual gives the most accurate steps for your exact oven. Use general guides for help, but rely on official instructions when the panel looks different.
EEAT Authority References
For model-specific controls, always check the official Bosch appliance manual or Bosch support page. Bosch ovens can vary by region, product line, and control panel type. A guide can explain the common process, but the manual confirms the right button sequence for your exact model.
For kitchen usability and home organization topics, DecorFixer’s Kitchen Refresh and Beginner Tools categories can support readers who want practical home setup advice beyond appliance settings.
FAQs
Why is my Bosch oven clock flashing 00:00?
Your Bosch oven clock usually flashes 00:00 after first installation, unplugging, or a power outage. It means the oven needs the time set again. Enter clock mode, adjust the hour and minutes, then confirm the setting.
Which button sets the clock on a Bosch oven?
Many Bosch ovens use a clock button, time-setting button, or settings menu. Some models cycle through timer, cooking duration, end time, and clock. Stop when the time display flashes, then use plus, minus, arrows, or a rotary dial to adjust it.
Why won’t my Bosch oven clock set?
The clock may not set if the oven is in cooking mode, timer mode, child lock, or if the setting was not confirmed. Make sure the oven is off, enter clock mode, adjust the time, and wait until the display stops flashing.
Does every Bosch oven set the clock the same way?
No. Bosch ovens vary by model and control panel. Older models may use clock and plus/minus buttons, while newer models may use touch menus or basic settings. Check your model manual if the buttons do not match common steps.
Do I need to reset my Bosch oven after a power cut?
You may need to reset the clock after a power cut, especially if the display flashes 00:00. You usually do not need a full appliance reset. Set the clock first. If the panel does not respond, check power and consult official support.
Conclusion
Setting the clock on a Bosch oven should not feel stressful. Once you understand the basic pattern, the process becomes simple: make sure the oven is off, find the clock setting, adjust the hour and minutes, then confirm the time. The only tricky part is that Bosch models do not all use the same control panel. That is why your model number and manual matter.
Take your time, press each button with purpose, and watch the display before moving to the next step. A correctly set oven clock makes your kitchen feel calmer and helps your timer features wor