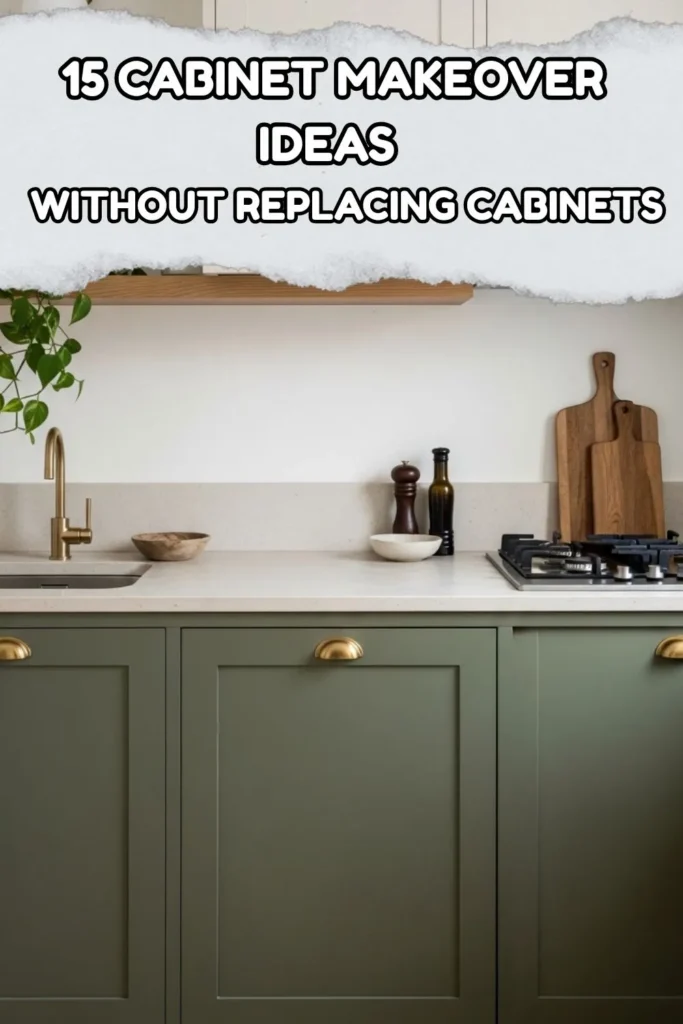
There is a moment in many kitchens when the cabinets start to bother you more than the countertops, the floor, or the wall color. The layout still works. The storage still helps. Yet the doors look tired, the hardware feels dated, and the whole room seems flatter than it should.
That is where cabinet makeover ideas without replacing cabinets become genuinely useful. You may not need demolition, custom cabinetry, or a large renovation budget. A warmer paint color can soften a harsh kitchen. New pulls can add a more refined rhythm. A few glass-front doors can help a row of heavy upper cabinets feel lighter.
The goal is not to disguise a serious problem. It is to work with cabinets that remain solid and functional, then give them a more thoughtful finish.
Why Cabinet Makeovers Matter
Cabinets take up a large amount of visual space in a kitchen, bathroom, laundry room, or built-in storage area. Their color, hardware, proportions, and condition shape the mood of the whole room. When the cabinet boxes remain sturdy and the layout still works, replacement may create more disruption than you need.
The most effective cabinet makeover ideas without replacing cabinets focus on the parts your eye notices first: doors, drawer fronts, handles, lighting, trim, and nearby surfaces. A fresh paint color, updated hardware, better lighting, or a few simple trim details can make existing cabinets feel cleaner, warmer, and more intentional without a full remodel.
A good makeover respects the existing structure. It improves what already works and fixes the details that make the room feel dated.
Before You Start: Inspect the Cabinet Material and Condition
Open every door and check the hinges, shelves, drawer slides, edges, and cabinet boxes. Look for swelling, water damage, loose joints, peeling surfaces, and soft areas around the sink. Cosmetic updates make sense only when the underlying cabinets are still solid and functional.
Identify the cabinet material before painting, sanding, or applying any new finish. Solid wood, wood veneer, laminate, thermofoil, and vinyl surfaces all need different preparation. Some slick or flexible surfaces may not hold paint well and can chip quickly if they are not handled correctly. If you are unsure what your cabinets are made from, ask a paint-store professional or an experienced contractor before starting.
If your home predates 1978, review lead-safe renovation guidance before disturbing old paint. Start carefully, because preparation affects the final finish more than the color you choose.
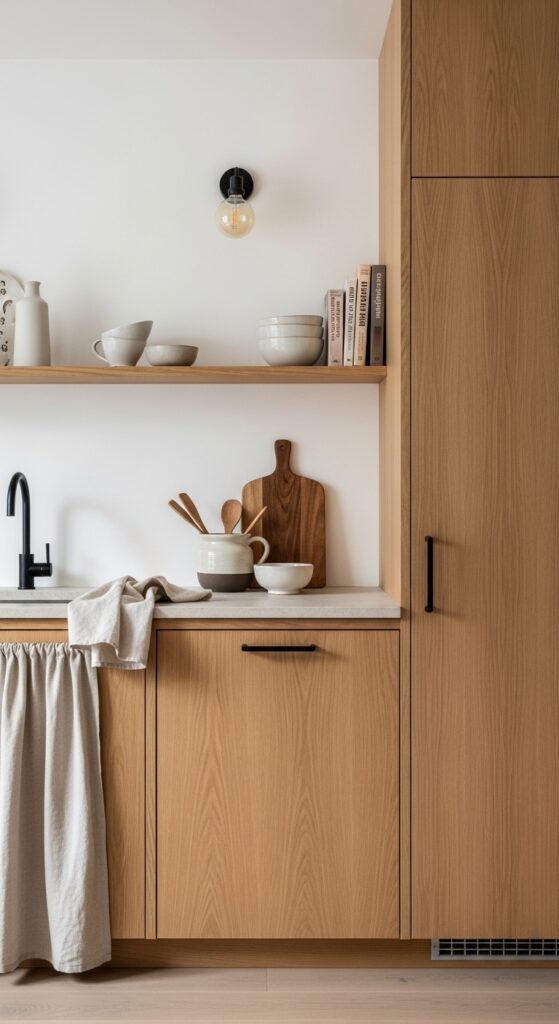
1. Clean and Condition Natural Wood Cabinets
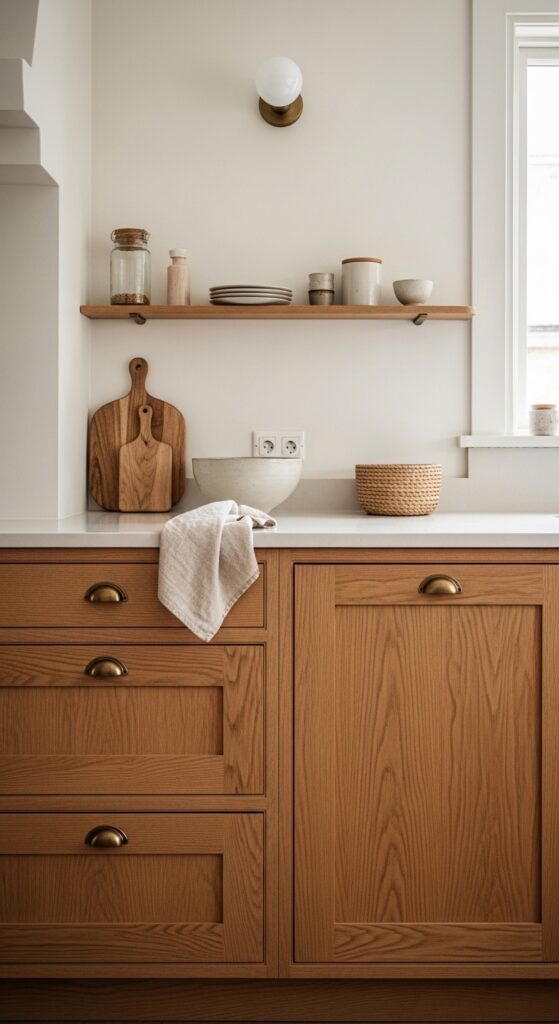
Not every cabinet needs paint. Natural wood can look rich and warm when you remove greasy buildup and care for the finish properly. This approach works well in kitchens with oak, walnut, maple, or cherry cabinets that remain structurally sound but look dull after years of use.
Start with a gentle cleaner suited to the existing finish. Work on one discreet area first. Tighten loose hardware, repair minor scratches with a compatible product, and follow the cabinet manufacturer’s care guidance where available. Pair the refreshed wood with warm neutrals, woven textures, and simple hardware.
Avoid using harsh cleaners or aggressive sanding without understanding the finish. A careful cleaning can reveal beautiful grain that heavy paint would hide.
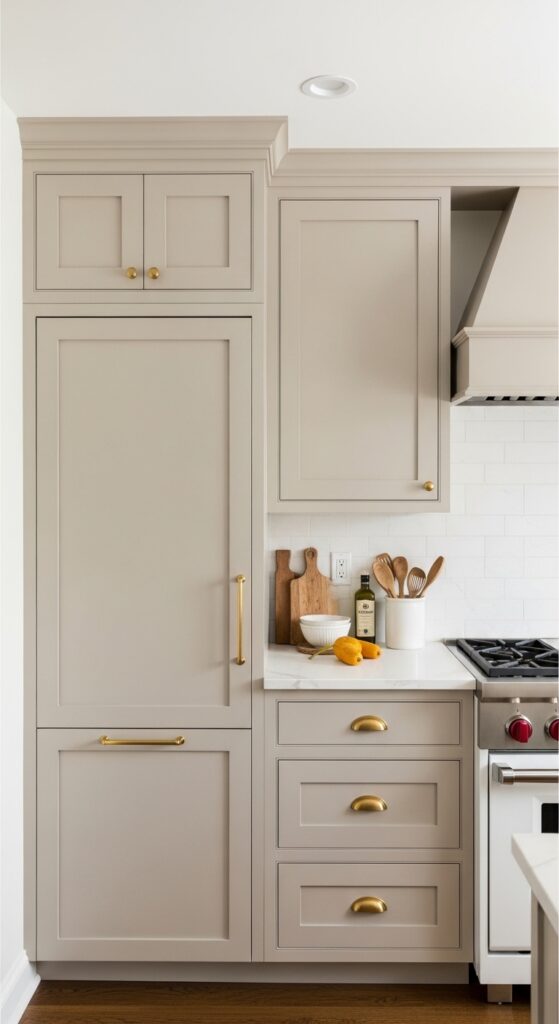
2. Repaint Cabinets in a Warm Neutral or Muted Color
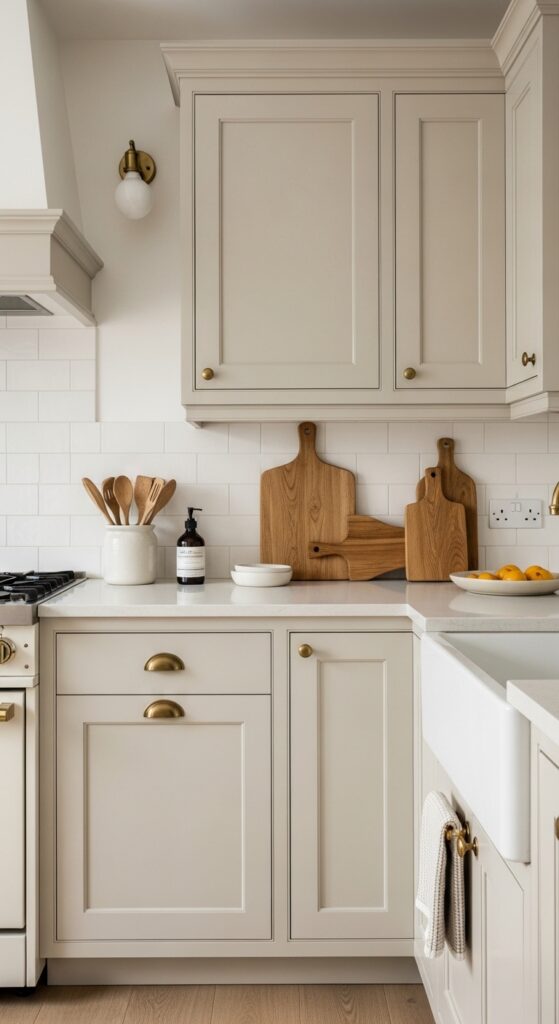
Paint can give dated cabinets a clearer, calmer presence. Warm white, mushroom, muted olive, soft taupe, dusty blue, and clay-tinted beige work well with natural materials and everyday kitchen lighting. This idea suits kitchen cabinets, bathroom vanities, laundry storage, and hallway built-ins.
Before painting, remove the doors and hardware, clean away grease, repair visible damage, lightly sand the surface, and use a primer suited to the cabinet material. Label every door and hinge location before starting so everything goes back in the right place. Apply thin, even coats and allow proper drying and curing time for a smoother, longer-lasting finish.
Avoid painting over grime, glossy finishes, or peeling layers. Rushed preparation usually shows at the edges and around the handles. For a bathroom-specific refresh, browse these small bathroom makeover ideas on a budget.
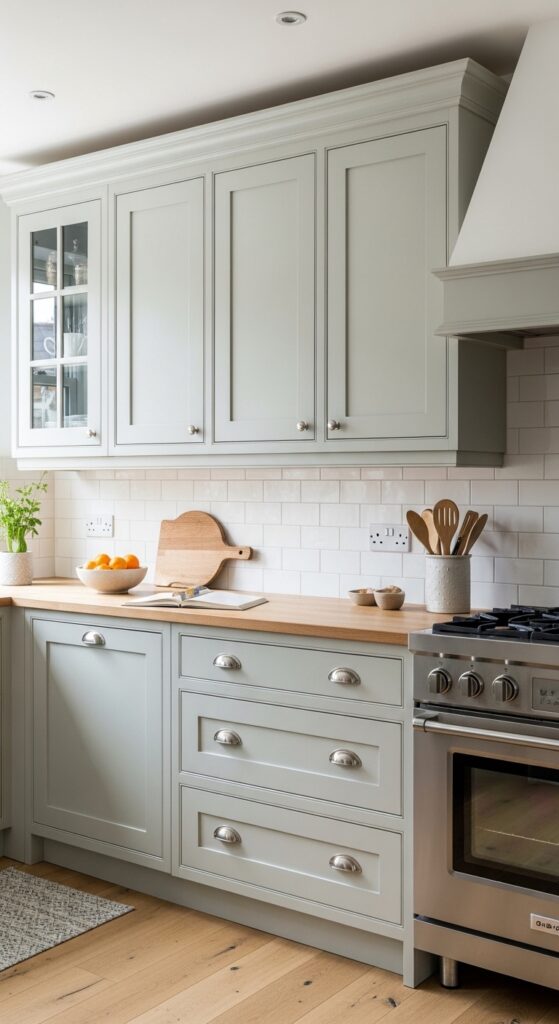
3. Try a Two-Tone Cabinet Color Scheme
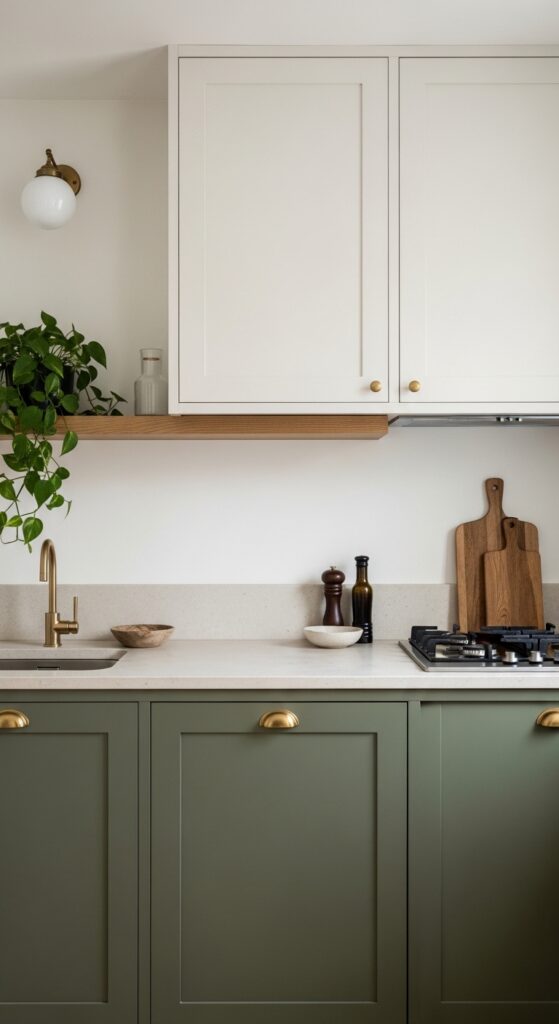
A two-tone palette can break up a wall of cabinetry and give a kitchen more depth without changing the layout. Use a grounded shade on the lower cabinets and a lighter tone above. Soft olive lowers with creamy uppers, charcoal lowers with warm white uppers, or mushroom lowers with pale beige uppers can create visual harmony.
This approach works especially well in smaller kitchens because lighter upper cabinets help the room feel more open. Keep the undertones connected and repeat one color through a rug, bowl, or linen café curtain. Test large swatches beside the countertop and backsplash before painting.
Avoid using two unrelated colors with equal visual weight. One tone should lead while the other keeps the room balanced.
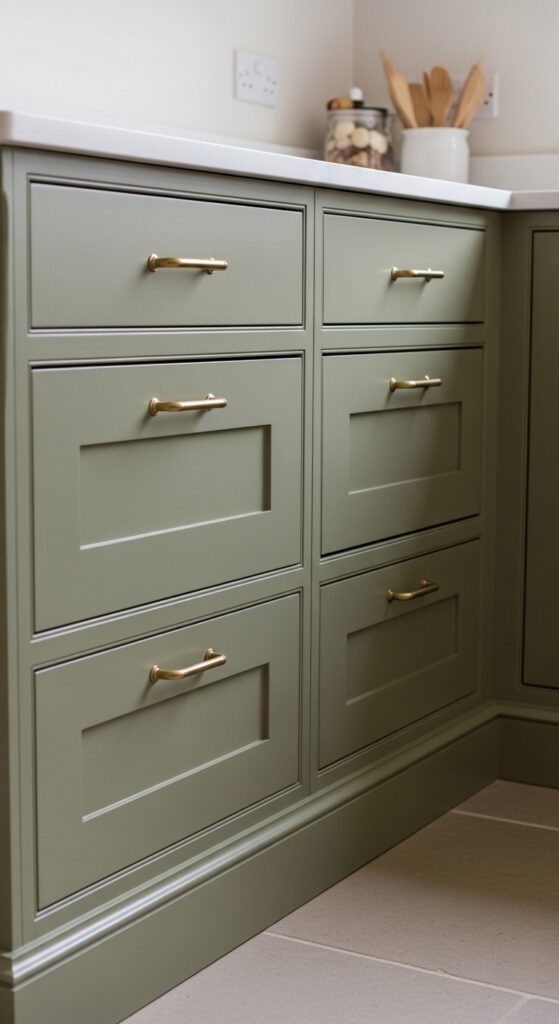
4. Replace Cabinet Knobs and Pulls
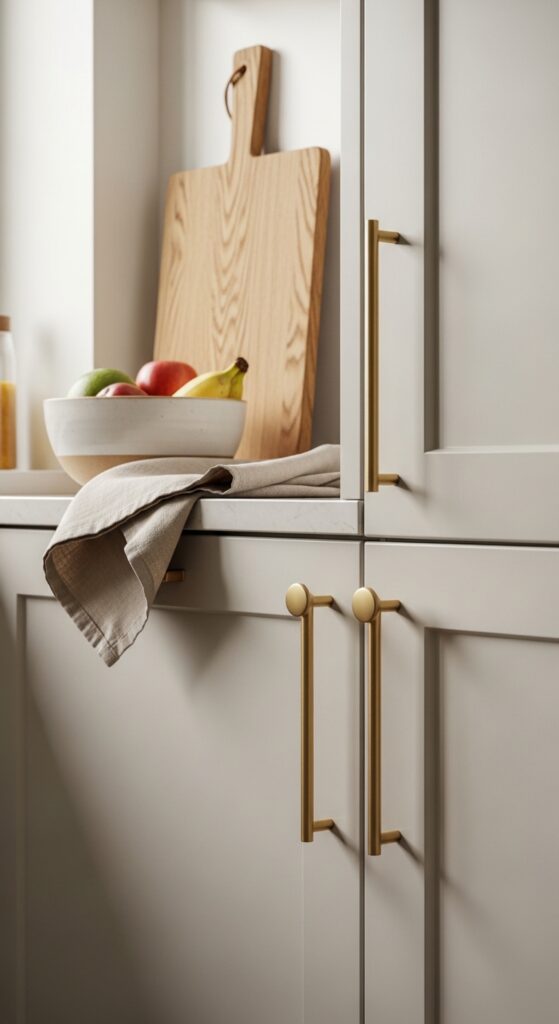
Hardware repeats across the room, so a small change can create a noticeable result. Brushed brass, aged bronze, warm nickel, matte black, and simple wood knobs can sharpen plain cabinets without making them feel overly decorative. This works well in kitchens, bathrooms, laundry rooms, and freestanding storage cabinets.
Measure the distance between existing screw holes before buying new pulls, and choose a finish that connects with the rest of the room. Simple bar pulls, rounded knobs, or softly textured handles can make cabinets feel more updated without overwhelming the design. Keep the original hardware in a labeled bag so you can reinstall it later if needed.
Avoid drilling fresh holes unless you plan the layout carefully. Choose a scale that suits the door size. Oversized handles can overwhelm narrow doors, while tiny knobs may disappear on wide drawers. For more rental-friendly kitchen details, read these apartment kitchen upgrades without renovation.
5. Add Slim Molding to Flat Cabinet Doors
Flat-front cabinet doors can gain more character with simple trim. Thin molding can create a Shaker-inspired outline, a quiet picture-frame detail, or a subtle vertical accent. This works well when slab doors feel too plain but the cabinets remain solid.
Plan the spacing with painter’s tape before cutting anything. Use consistent measurements across every door and choose trim that does not interfere with hinges or drawer movement. Paint the molding and door in the same color for a clean result. A warm neutral or muted green can make the added structure feel timeless.
Avoid adding ornate trim to every surface. Simple lines often look more convincing. Uneven gaps and rushed cuts will stand out once the paint dries, so measure carefully.
6. Reface Cabinet Boxes With Veneer or Laminate
Refacing can give cabinets a fresher surface while keeping the existing boxes in place. The process usually involves updating the visible parts of the cabinets, such as the outer surfaces, doors, drawer fronts, and hardware. Depending on the look you want, this may include wood veneer, laminate, thermofoil, or new cabinet fronts.
This option works best when the layout suits your needs but the exposed finishes show wear. Natural wood veneer can introduce rich grain and warmth, while a simple laminate can create a cleaner look in a modern kitchen. Ask an experienced installer for help if the project requires precise cutting, smooth edges, or careful alignment.
Avoid covering damaged boxes or loose edges. Refacing improves appearance, but it does not repair water damage or solve an inefficient layout.
7. Replace Only the Doors and Drawer Fronts
You can keep the cabinet boxes and replace only the visible fronts when the door style dates the room. Shaker-style doors bring structure without fuss. Slim slab fronts suit modern interiors. Reeded details can add tactile texture in a small dose.
Measure carefully and confirm hinge compatibility before ordering. This idea works especially well when the current boxes remain sturdy but the doors look worn, heavily routed, or difficult to repaint. Repeat the new door finish through one or two other materials, such as oak stools, linen textiles, or a wood shelf.
Avoid choosing a detailed profile that competes with a busy backsplash. The new fronts should support the room, not add another loud feature. Keep the palette focused and the proportions consistent.
8. Add Glass or Reeded Inserts to Selected Upper Doors
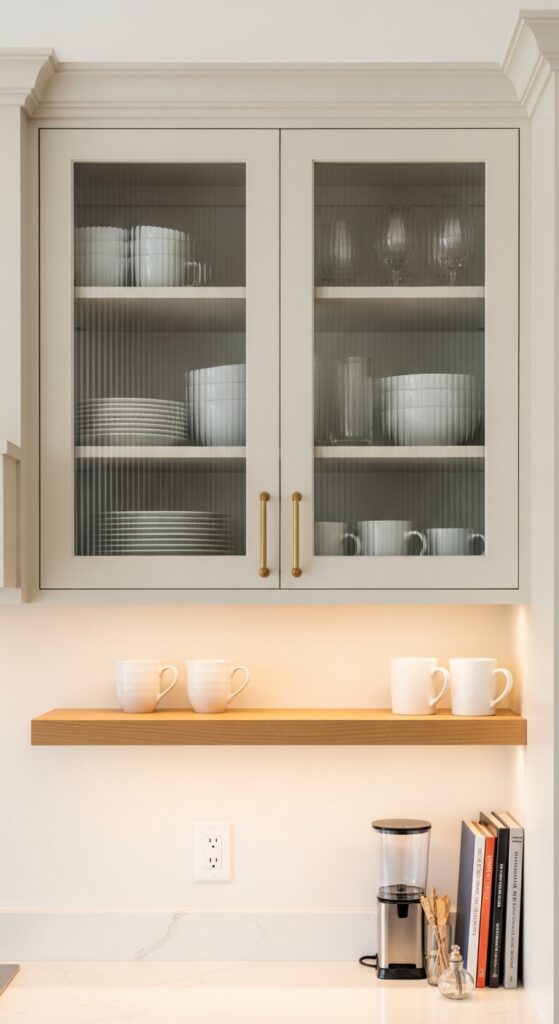
Glass-front cabinets can make a row of upper cabinets feel lighter and more personal. Use clear glass for neatly arranged dishes, seeded glass for softer texture, or reeded glass when you want to blur the contents slightly. If your cabinet doors have framed center panels, those panels may be replaced with glass inserts when the door style and construction allow it.
Choose one or two upper cabinets near a sink, dining nook, or coffee corner. Keep the shelves edited with stacked white dishes, glassware, or handmade ceramics. Add warm lighting inside only when the installation suits the cabinet and can be done safely.
Avoid converting every upper door. Too much visible storage can make the kitchen feel cluttered. Selected glass panels create breathing room while closed cabinets still hide everyday packaging.
9. Remove a Few Upper Cabinet Doors for Open Shelving
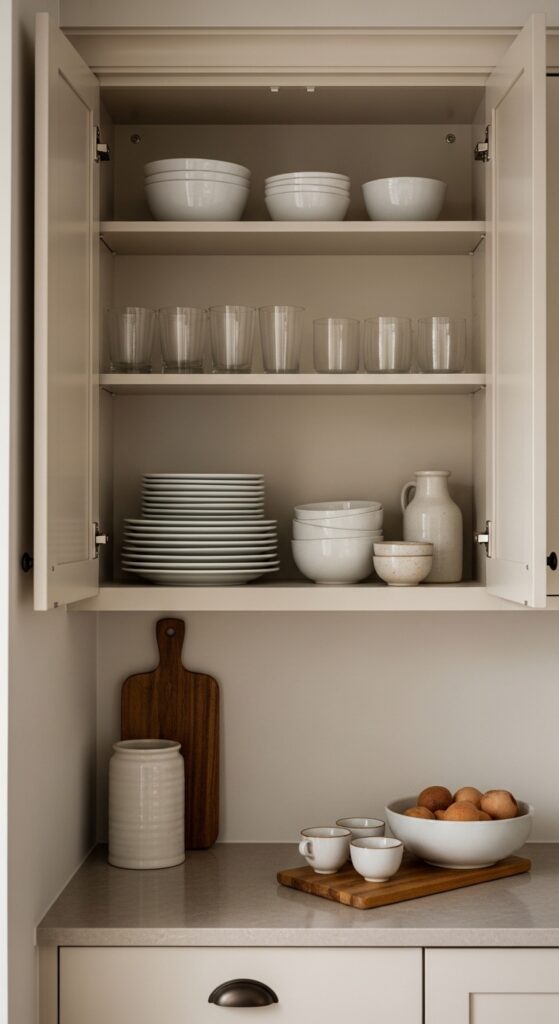
Removing selected upper doors can create an airy open-shelf effect without removing the cabinet boxes. This works well in a breakfast corner, coffee station, or small galley kitchen where a long run of upper cabinets feels heavy.
Ask yourself whether the visible shelves will hold attractive daily items before making the change. Stack dishes by type, add one ceramic bowl, and keep the color palette restrained. Label and store every removed door, hinge, and screw safely. If you rent, ask for written approval before making changes.
Avoid exposing shelves filled with food boxes, mismatched mugs, and unused dishes. Open storage needs regular editing, so keep only the items you use often or genuinely enjoy seeing.
10. Line Cabinet Backs With Removable Wallpaper
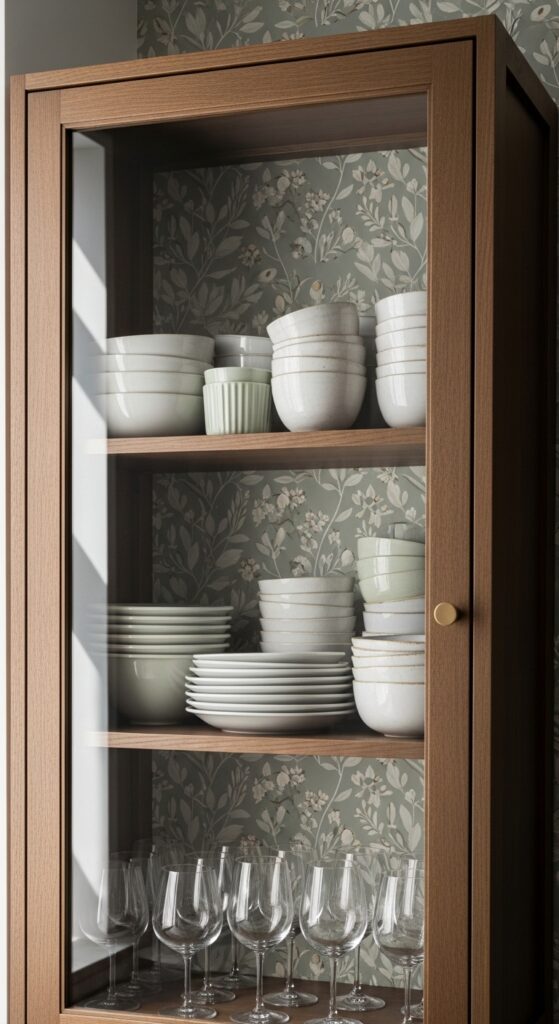
A removable wallpaper panel inside a glass cabinet, open shelf, or pantry can add pattern without covering a full wall. A muted botanical, narrow stripe, linen-look texture, or soft geometric print can create a gentle focal point behind simple dishes and baskets.
Measure each cabinet backing carefully and order a sample first. Clean the surface, patch-test the adhesive, and keep the pattern scale in proportion to the cabinet opening. This works especially well in kitchens, laundry rooms, craft storage, and freestanding glass-front cabinets.
Avoid lining every cabinet in a bold print. One controlled detail feels more considered, especially when the pattern supports the room’s existing colors instead of competing with them.
11. Refresh Exposed End Panels and Island Backs
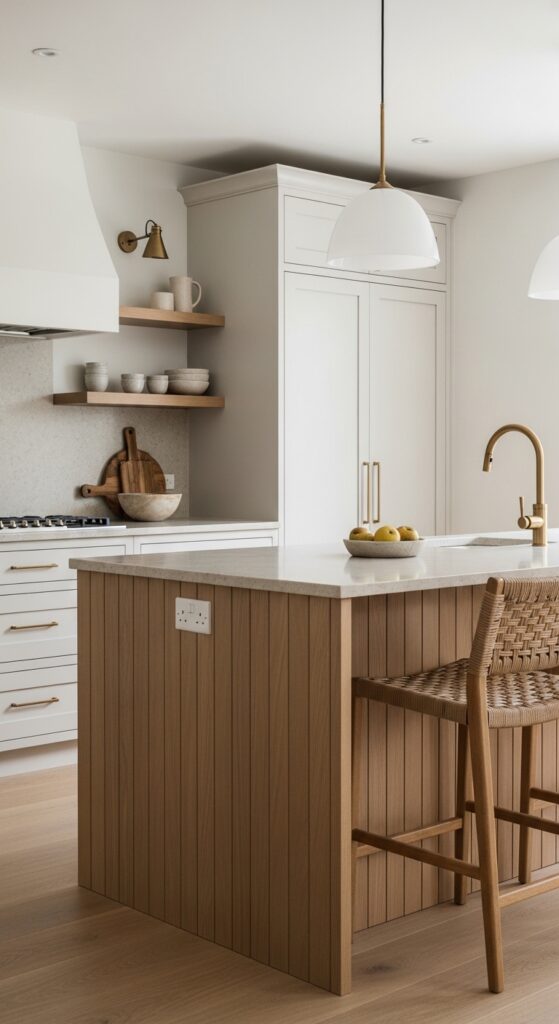
Cabinet end panels often look unfinished beside a thoughtfully styled room. Adding slim vertical battens, beadboard-style paneling, or a simple framed trim detail can give an island or exposed cabinet side more structure. Paint the new detail the same shade as the cabinet for a cohesive look.
This approach works well on kitchen islands, peninsula backs, bathroom vanity sides, and laundry-room cabinets. Plan the spacing with painter’s tape and check that the trim does not interfere with doors, outlets, or seating. Natural wood battens can also introduce warmth when the room needs more texture.
Avoid using several competing panel styles in one kitchen. Choose one architectural language and repeat it quietly. A small end-panel update should feel integrated rather than added at the last minute.
12. Add Crown Molding or a Simple Topper Above Upper Cabinets

The gap above upper cabinets can collect dust and make a kitchen feel unfinished. A well-planned crown molding detail, painted topper, or simple trim band can draw the eye upward and create a more built-in appearance. This works best when the ceiling height and cabinet spacing allow a clean, proportional finish.
Measure carefully before adding trim, and choose a style that connects with the cabinet doors instead of competing with them. A simple, narrow molding often looks more natural than an oversized decorative piece, especially in a smaller kitchen.
Avoid using heavy molding in a compact space. The goal is to create a finished line, not a bulky border. Hire an experienced carpenter when ceiling angles, uneven walls, or detailed cuts make the project difficult.
13. Add Warm Under-Cabinet Lighting
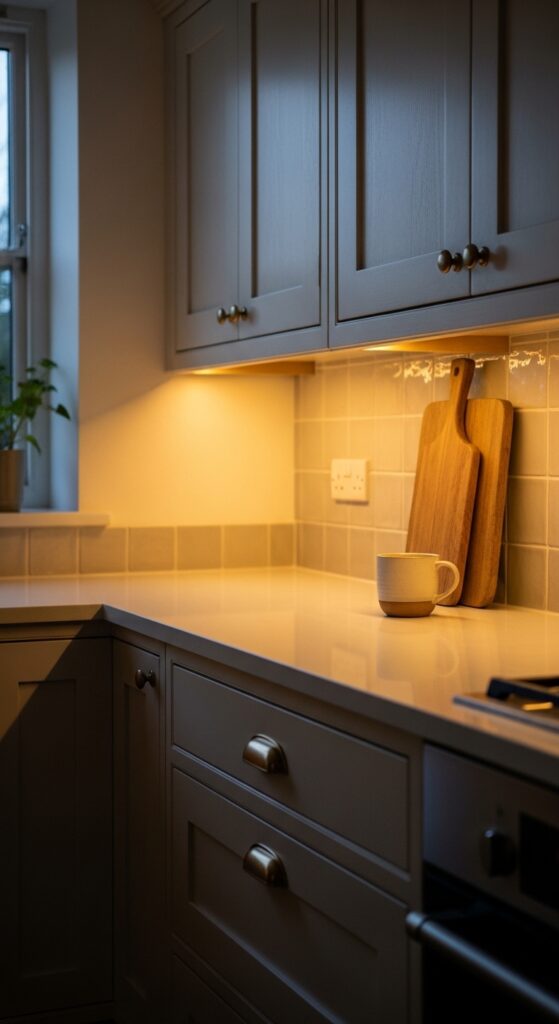
Under-cabinet lighting improves both the look and function of a kitchen. It brightens work surfaces, softens evening shadows, and helps a basic backsplash feel more considered. Rechargeable or battery-powered lights offer an accessible option for apartments and simple updates, while hardwired lighting may suit a more permanent project.
Place the light source toward the front edge of the cabinet so it reaches the work surface more evenly. Choose a consistent warm color temperature across the kitchen. Hide wires and follow the product instructions carefully. Hire a qualified electrician for hardwired work.
Avoid mixing harsh blue light with warm ceiling bulbs. Uneven lighting can make the kitchen feel disconnected. For more approachable home updates, save these easy DIY projects for first-time homeowners.
14. Organize Cabinet Interiors Around Daily Routines
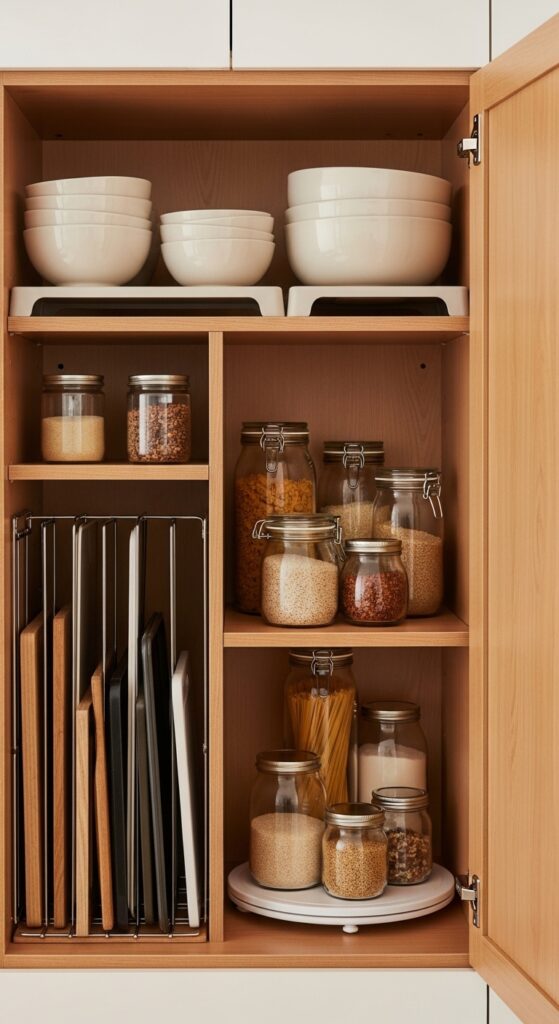
A cabinet makeover should improve more than the exterior. Drawer dividers, pull-out baskets, shelf risers, turntables, and vertical tray organizers can make existing storage easier to use. Begin with the cabinet that causes the most frustration, such as the crowded spice shelf, cleaning cabinet, or stack of baking trays.
Measure the interior before ordering organizers. Group items by routine and keep the things you reach for most often at a comfortable height. Use baskets or bins only when they solve a clear problem. In a bathroom vanity, pair interior storage with these no-drill bathroom storage ideas.
Avoid filling cabinets with organizers before decluttering. A better system starts with fewer unnecessary items, not more containers.
15. Fix Hinges, Toe Kicks, and Small Alignment Problems
The final details often determine whether a cabinet makeover feels complete. Tighten loose hinges, adjust doors that sit unevenly, replace worn bumpers, and clean or refresh the toe kick. These quiet improvements may not look dramatic in a before-and-after photograph, but they change the way the cabinetry feels every day.
Paint the toe kick to match the base cabinets or use a compatible finished panel when the existing surface looks damaged. Check that doors close smoothly and drawer pulls line up across the room. Replace hinges only when the new part suits the cabinet construction.
Avoid ignoring small alignment issues after spending time on paint or hardware. A carefully finished kitchen depends on straight lines, smooth movement, and details that work properly.
A Final Styling Rule: Choose One Lead Finish
Once the cabinet work is complete, step back before adding more. Let one finish lead the room. Painted olive cabinets can pair with warm wood and a quiet cream backsplash. Natural oak cabinets can sit beside soft stone tones and brushed brass. A two-tone kitchen can use one subtle floor pattern without adding several competing prints.
Repeat a small group of materials across nearby surfaces: wood, ceramic, woven fiber, linen, and one metal finish. Keep countertops clear enough for cooking. Leave open shelves partly empty.
When planning a larger kitchen refresh, combine these cabinet updates with the most relevant apartment kitchen upgrades without renovation and peel-and-stick floor tile ideas. A coordinated plan usually feels calmer than a collection of unrelated projects.
Frequently Asked Questions
What are the easiest cabinet makeover ideas without replacing cabinets?
Start with a deep clean, new knobs or pulls, hinge adjustments, and organized interiors. If the cabinet material suits paint, repainting the doors and drawer fronts can create a larger visual change. Always inspect the cabinet condition and surface type before choosing a project.
Can I paint kitchen cabinets without sanding them?
Some products may reduce the amount of sanding required, but you still need proper surface preparation. Clean away grease, repair damage, and follow the paint and primer instructions. A light sanding often helps adhesion. Ask a paint-store professional when the existing finish remains unclear.
Is cabinet refacing cheaper than replacing cabinets?
Refacing can cost less than full replacement because the existing boxes stay in place. The final cost depends on the cabinet condition, materials, kitchen size, labor, and whether you replace doors or hardware. It works best when the layout already suits your needs.
How can I make old cabinets look more expensive?
Use a limited palette and focus on finish quality. Clean or repaint the cabinets carefully, replace mismatched hardware, adjust uneven doors, add under-cabinet lighting, and keep nearby surfaces edited. A few well-planned details often look more polished than several rushed updates.
Can renters update cabinets without permanent changes?
Renters can replace hardware using the existing holes, line cabinet interiors with tested removable paper, organize shelves, add rechargeable under-cabinet lights, and style open surfaces carefully. Store every original part and request written landlord approval before removing doors, painting, drilling, or applying adhesive widely.